Improving bash workflow
#shellLet's face it - When you first encounter the command-line it is like entering the Matrix. It is scary and exciting at the same time, but yeah more scary. This is because we aren't used to such interfaces any more and it's not easy to see their advantages at first. But seriously, there are a lot and as a web developer or a web designer there are situations where you have to use it. This is why you should learn the basics, customize your tools and enhance your workflow. Probably you will fall in love with the command-line like I did too.
For those of you who just want to see my bash settings, you will find them here. But this is not going to be a tutorial on how to use the command-line. There are a lot of them already out there. This is about how to set it up in order to make it your friend and fun. But we will go through some fundamentals before we dig deeper.
Basics
Just before we dive right in let me tell you that I am far away from being a command-line expert. But I know how to use it for my needs and how to make you love it too. So let us make the command-line fun.
First we take a look at some expressions: Shell, Bash, Prompt and Terminal
You have probably heard all of them before, which is one of the reasons why it can get a little bit confusing when you start to use the bash, äh - shell or terminal? But I can tell you right now, it isn't!
Shell is an application that provides a command-line interface for Unix or Unix-like operating systems. In a simple way that means that you can communicate with your system through typed commands. A Bash is a Shell, but a special one with more features. It stands for "Bourne Again Shell". It is today the standard shell on a lot of systems.
Another expression that confused me a lot was "prompt". It took me a time to figure out that the prompt is just the beginning of a line in a shell that indicates where you start to type. It is just a sequence of characters indicating where your commands begin.
The last thing we need is an application that provides us access to a shell. On a Mac the Terminal is the standard application, but there are others too. This article will concentrate on Mac but most of the stuff will work on other Linux systems as well.
Setting files
Most of the settings for your command-line will be placed in your .bash_profile file which you can find in your home directory. The dot is used as an indicator to hide these files. Normally you will not see them in the Finder. This is why you will read a lot about "dotfiles" when you deal with this subject. The Terminal runs .bash_profile file every time you start it or when you open a new window. This is different to other systems where this file is run only once and most of the settings should be written in the .bashrc file which is also a standard file. Just keep in mind here that on a Mac we will use the .bash_profile file, but there are other ways too.
The .bash_profile file could contain all of our customizations, but it is cleaner to split things up. This is why I have additional files which will be included into the .bash_profile with this command:
#load extra setting files
for file in ~/.{bash_prompt,aliases,functions}; do
[ -r "$file" ] && source "$file"
done
unset file
I have separated my settings into these files:
- bash_profile
- aliases
- bash_prompt
- functions
Bash Prompt
The prompt indicates that the computer is ready to accept input. This is how a standard prompt looks like on Mac OSX.
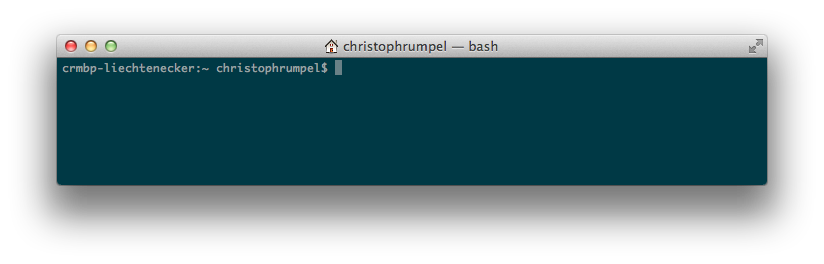 As you can see it contains my computer's name, my username and ends with a dollar sign. It is common to have the dollar sign at the end of the prompt. Nothing fancy here, but we will change that now. This is how the prompt could look like too.
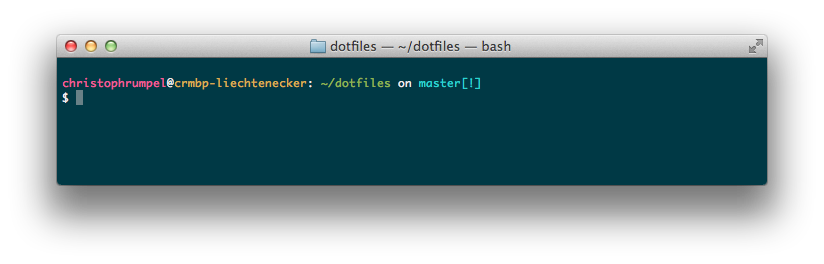
This looks much better right? You can immediately see where you are right now (~/dotfiles) and you get information about existing Git repositories in that folder. Additionally I pimped things up with some nice colors. Most of my prompt setting are from Nicolas Gallagher dotfiles. He has also explained a lot of his settings there. Check it out! We both use the Solarized theme and therefor we first define some of its colors for our prompt. This is how you can define a color for your command-line. We are using a tput command to save the color in a variable.
SOLAR_YELLOW=$(tput setaf 136)
The whole prompt is saved in the PS1 variable. You can check your current prompt variable by echoing it out. ("echo $PS1") There are a lot of escaped characters so that you are able to show the current date, hostname, directory etc. You will find a list of them here. Try to change your prompt by writing this command in your command-line:
PS1="\d \h $ "
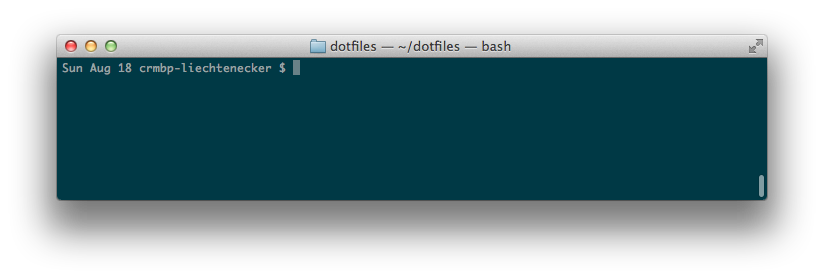
Your prompt will immediately change and show the current date ("\d") as well as your hostname ("\h"). The dollar sign is just the end of the prompt here. This change will be overwritten when you open a new window, this why we write theses commands in the setting files so we do not have to write them every time we open the command-line. At the end of my prompt settings I put the PS1 variable together including my defined colors and the escaped variables. At the beginning we set the terminal's title to the current directory.
# Set the terminal title to the current working directory
PS1="\[<pre wp-pre-tag-3></pre>33]0;\w<pre wp-pre-tag-3></pre>07\]"
# Build the prompt
PS1+="\n" # Newline
PS1+="${style_user}\u" # Username
PS1+="${style_chars}@" # @
PS1+="${style_host}\h" # Host
PS1+="${style_chars}: " # :
PS1+="${style_path}\w" # Working directory
PS1+="\$(prompt_git)" # Git details
PS1+="\n" # Newline
PS1+="${style_chars}\$ \[${RESET}\]" # $ (and reset color)
Now the prompt consists of: username@hostname: directory gitdetails $.
You will also find some git-functions in my bash prompt settings which will generate the git-details. Just copy them, that is what I did too :-)
Theme
As I already mentioned I am using the Solarized theme, but there are many other great ones out there. I think it is important to use one you really like so you feel comfortable while using it. Solarized comes with both light and dark color-schemes and is very popular due to its perfect matching colors.
Aliases
Since you have to remember a lot of commands it is useful so set some aliases for your most used ones. Setting up an aliases is super simple:
alias gits='git status'
Now you can type "gits" to show your git status. Here are some further examples taken from my aliases setting files. Take a look at the file itself to see all of them.
# Go to my projects folder
alias goto_projects="cd /Volumes/HD/projects"

# Connect to my server
alias sshcr='ssh ssh-user@yourdomain.com'

# Git push origin master
alias gitpom='git push origin master'

#Laravel short artisan command
alias art='php artisan'

# be nice
alias please=sudo

# Reload bash settings after changes
alias reload_profile=". ~/.bash_profile"
They are all super useful and you can save a lot of time while using them.
Functions
In the last file I am using, I define some functions that help me throughout my routine. With these two functions, I can create and delete folders. The first one does not only create a folder, but opens it as well after that. Simple but great, right?
# Create a new directory and enter it
function md() {
    mkdir -p "$@" && cd "$@"
}

# Remove a direcory and its files
function rd() {
    rm -rf "$@"
}
Conclusion
So here ends the little tour through my bash settings and I hope I could show how to get more out of your command-line. The great thing here is that you can customize your command-line perfectly for your personal needs. It is a step-by-step process and I am still learning something new every day. You just need to start at a point and I promise you won't regret it.
If you already have your perfect settings, let us know about them and your personal little tricks.