Turn a lamp on and off with a Raspberry Pi and a Linker Kit Relay
#Turning on LEDs is nice, but maybe you have bigger dreams. In this tutorial I will show you how to control a high voltage lamp with a Raspberry Pi and Linker Kit Relay.
The idea
The plan is to control a lamp with our Raspberry Pi. Since the Pi can't be used for high voltage components we need a relay to help us. Think of a relay as a little controllable gate of a circuit. The Pi is able to control a 5V relay and in combination we can turn the lamp on or off.
The setup
This is what you will need:
- Raspberry Pi 2 Model B
- Linker Kit Baseboard Raspberry Pi
- Linker Kit Relay Module
- Lamp
- Really tiny slotted screwdriver
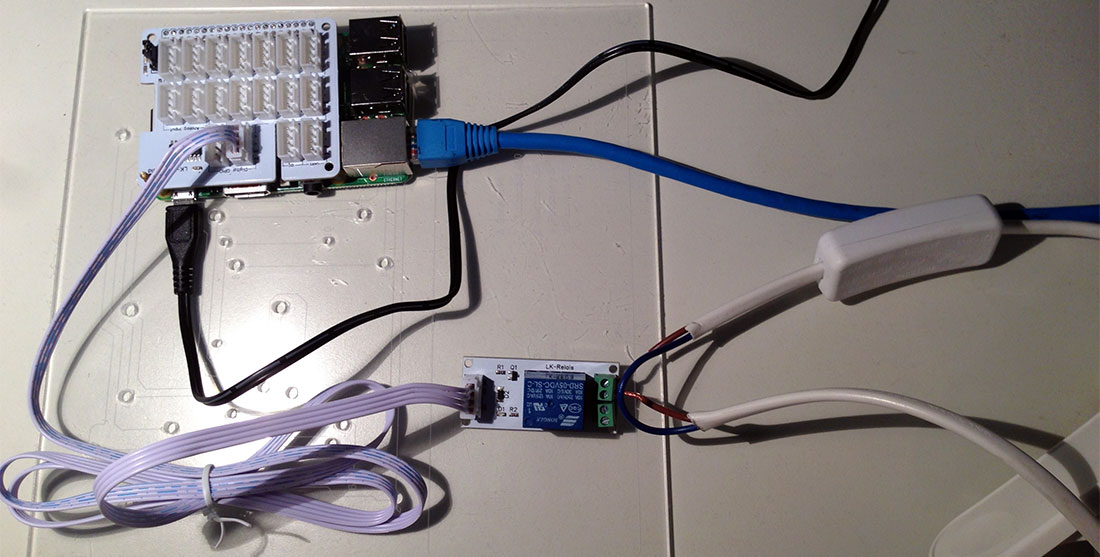
Linker Kit modules can help you at the beginning of your IoT career. The baseboard gets just plugged onto your Pi and will provide you with several connectors for other Linker Kit modules. This way you do not have to to soldier components or use a breadboard and jumper cables to get everything together. Just plug-and-play.
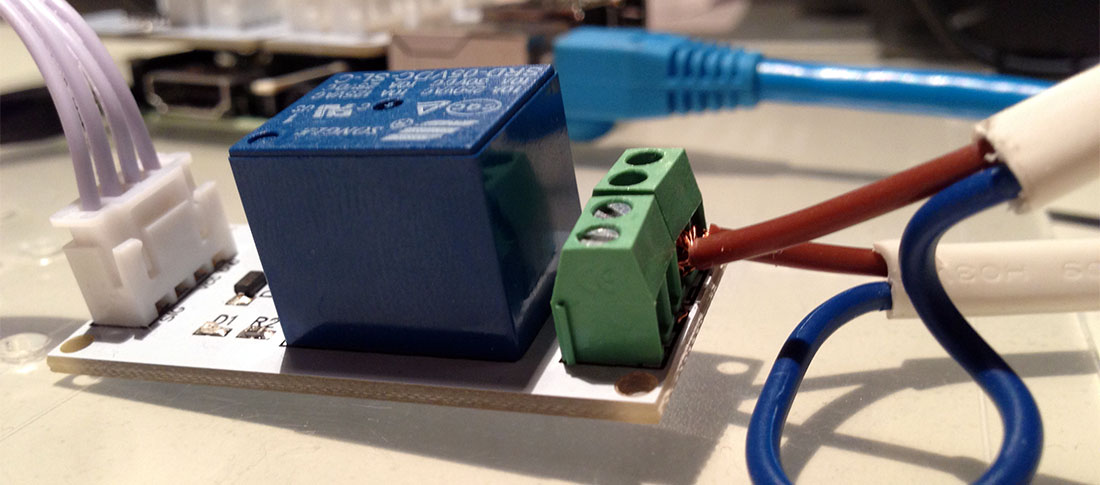
Connect the relay to one of the digital GPIO inputs of the baseboard. (D4 in our case) Then you need to link your lamp or other high voltage component to the relay. This is done with the hot (red or brown) wire of the device. Cut it and connect the one side to the relay input and one to the output of one of the gates. Then fix it with your insane tiny screwdriver. It doesn't matter which of the two gates you use because both are working at once.
The script
Now that we got everything set up, a python script will switch the relay on and off for us. This will happen every two seconds. A light on the relay shows when it is closed. Additionally you will hear it switch.
import RPi.GPIO as GPIO
import time

relay_pin = 4

GPIO.setmode( GPIO.BCM )
GPIO.setup( relay_pin,GPIO.OUT )

while True:

	GPIO.output(relay_pin,True)
	time.sleep(2.0)
	GPIO.output(relay_pin,False)
	time.sleep(2.0)
Now you should see your lamp go on and off every two seconds and it's time to do a little dance.
Conclusion
Linker Kit modules are quite handy but you won't find a lot of tutorials on how to use them. This is why I felt the need to write about my first usage of one of them.
Such a switch gives you a whole new world of possibilities for you next projects. Have fun and please be careful!