Laravel Real-Time Notifications
#laravel #javascriptIn this post, we will look at how we can send real-time notifications with Laravel, the Laravel WebSockets package, and Laravel Echo.
If you are looking for something specific, you can jump right into the different sections:
- Introduction
- Installation
- Broadcast Messages From Our Laravel Application With Events
- Listen To Messages From Our Front-End With Laravel Echo
- Broadcast Messages From Our Laravel Application With Notifications
- More Tips & Tricks Like Using SSL
- Conclusion
Introduction
HTTP is stateless. Usually, the client/browser asks for a URL, and the server returns the data. Only a refresh of the page can load new information. Most of the time, this is enough, but sometimes we want more.
Today, many tasks happen on the backend, and we want to inform the user about them right away. So there is a use-case for updating the front-end because of something that happened on the backend. A good example would be an export that takes a long time. The user should be able to continue working on the page and get notified when the export is finished.
To achieve this, our client could ask the server every second if something new happened, or you could use long polling. But the best solution is to create a new communication channel through WebSockets, which works in both ways.
Today we are going to build an application with real-time messaging. We will use a WebSocket solution called Laravel Websockets, built in PHP. We will look at two different ways of sending messages from our Laravel backend: First through a Laravel event and then through a Laravel notification.
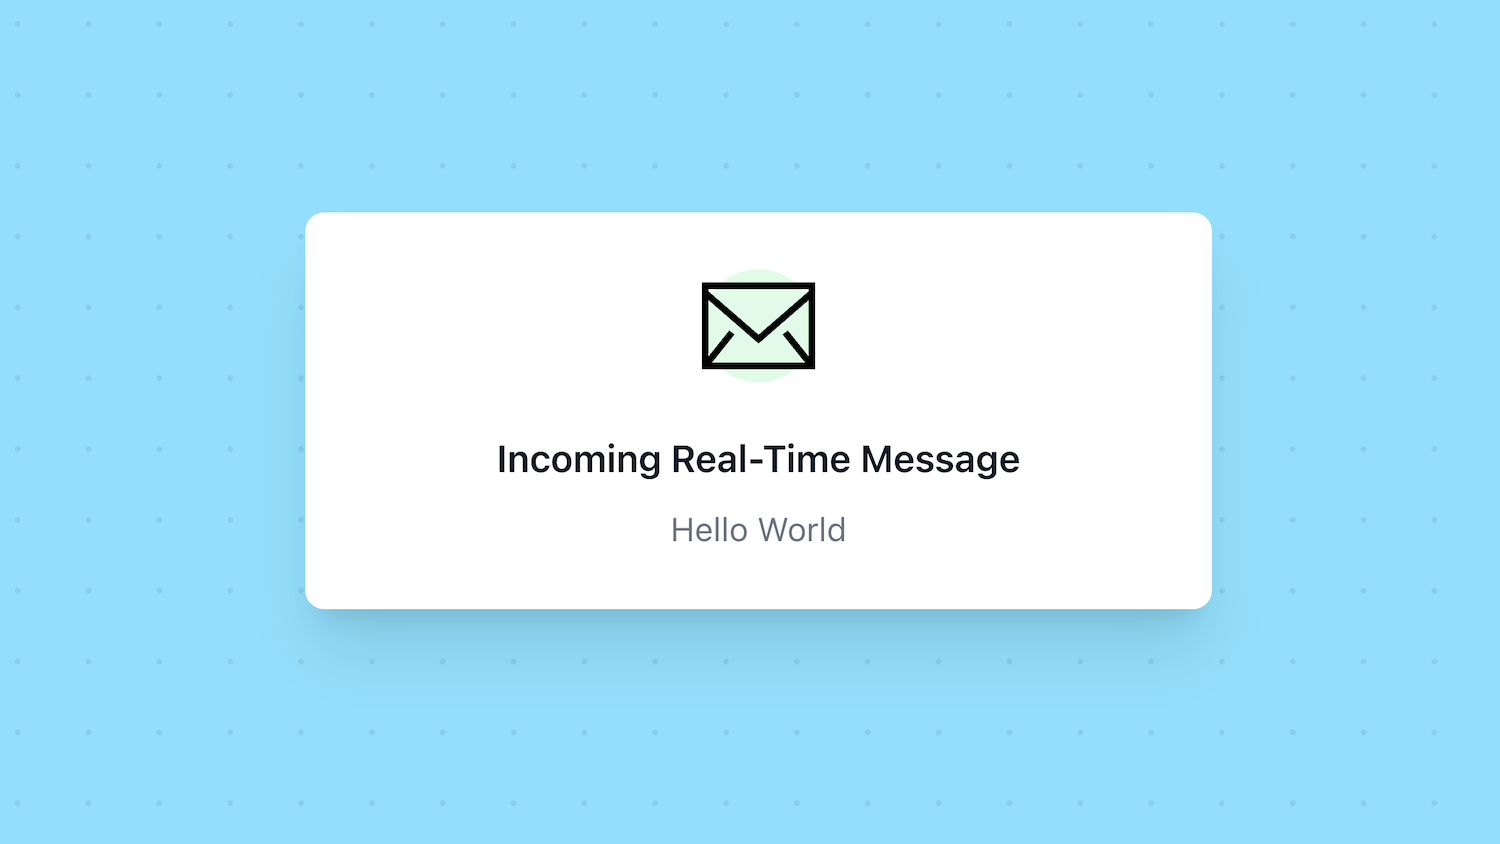
Here is a preview of what we are going to build today:
If you're just interested in the code, check the repository with all examples from this article here.
Installation
We start by creating a new Laravel 8 application. I always recommend using the Laravel Installer for this purpose.
laravel new laravel-real-time-notifications
To achieve our goal of sending real-time notifications, we need to make three parts work together:
- Sending/broadcasting notifications from our Laravel application
- A WebSockets server that receives those notifications
- Our front end that listens to the WebSockets server
Let's start with the WebSockets server.
Installing Laravel Websockets
Require the Laravel WebSockets package. It works as a replacement for external services like Pusher. Many settings will refer to Pusher today but be reminded that we are not using it. We want our own solution.
composer require beyondcode/laravel-websockets
We also need a package by Pusher.
composer require pusher/pusher-php-server
Next, adapt your .env file. We want the BROADCAST_CONNECTION to be pusher.
BROADCAST_CONNECTION=pusher
And we need to set the Pusher credentials.
PUSHER_APP_ID=12345
PUSHER_APP_KEY=12345
PUSHER_APP_SECRET=12345
PUSHER_APP_CLUSTER=mt1
We can define all those values ourselves. We are not actually using Pusher, but the package uses these keys, making replacing Pusher (if you use it) as simple as possible.
The Laravel WebSockets package comes with a migration file for storing statistics and a config file we need to adapt. Let's publish them.
php artisan vendor:publish --provider="BeyondCode\LaravelWebSockets\WebSocketsServiceProvider" --tag="migrations"
This will create a new migration file that we can run. Ensure you have set up a database for this project and defined the DB credentials in the .env file. Afterward, we can run the migration.
php artisan migrate
And here, we publish the config file of Laravel Websockets.
php artisan vendor:publish --provider="BeyondCode\LaravelWebSockets\WebSocketsServiceProvider" --tag="config"
Now we are ready to start the WebSockets server.
php artisan websockets:serve
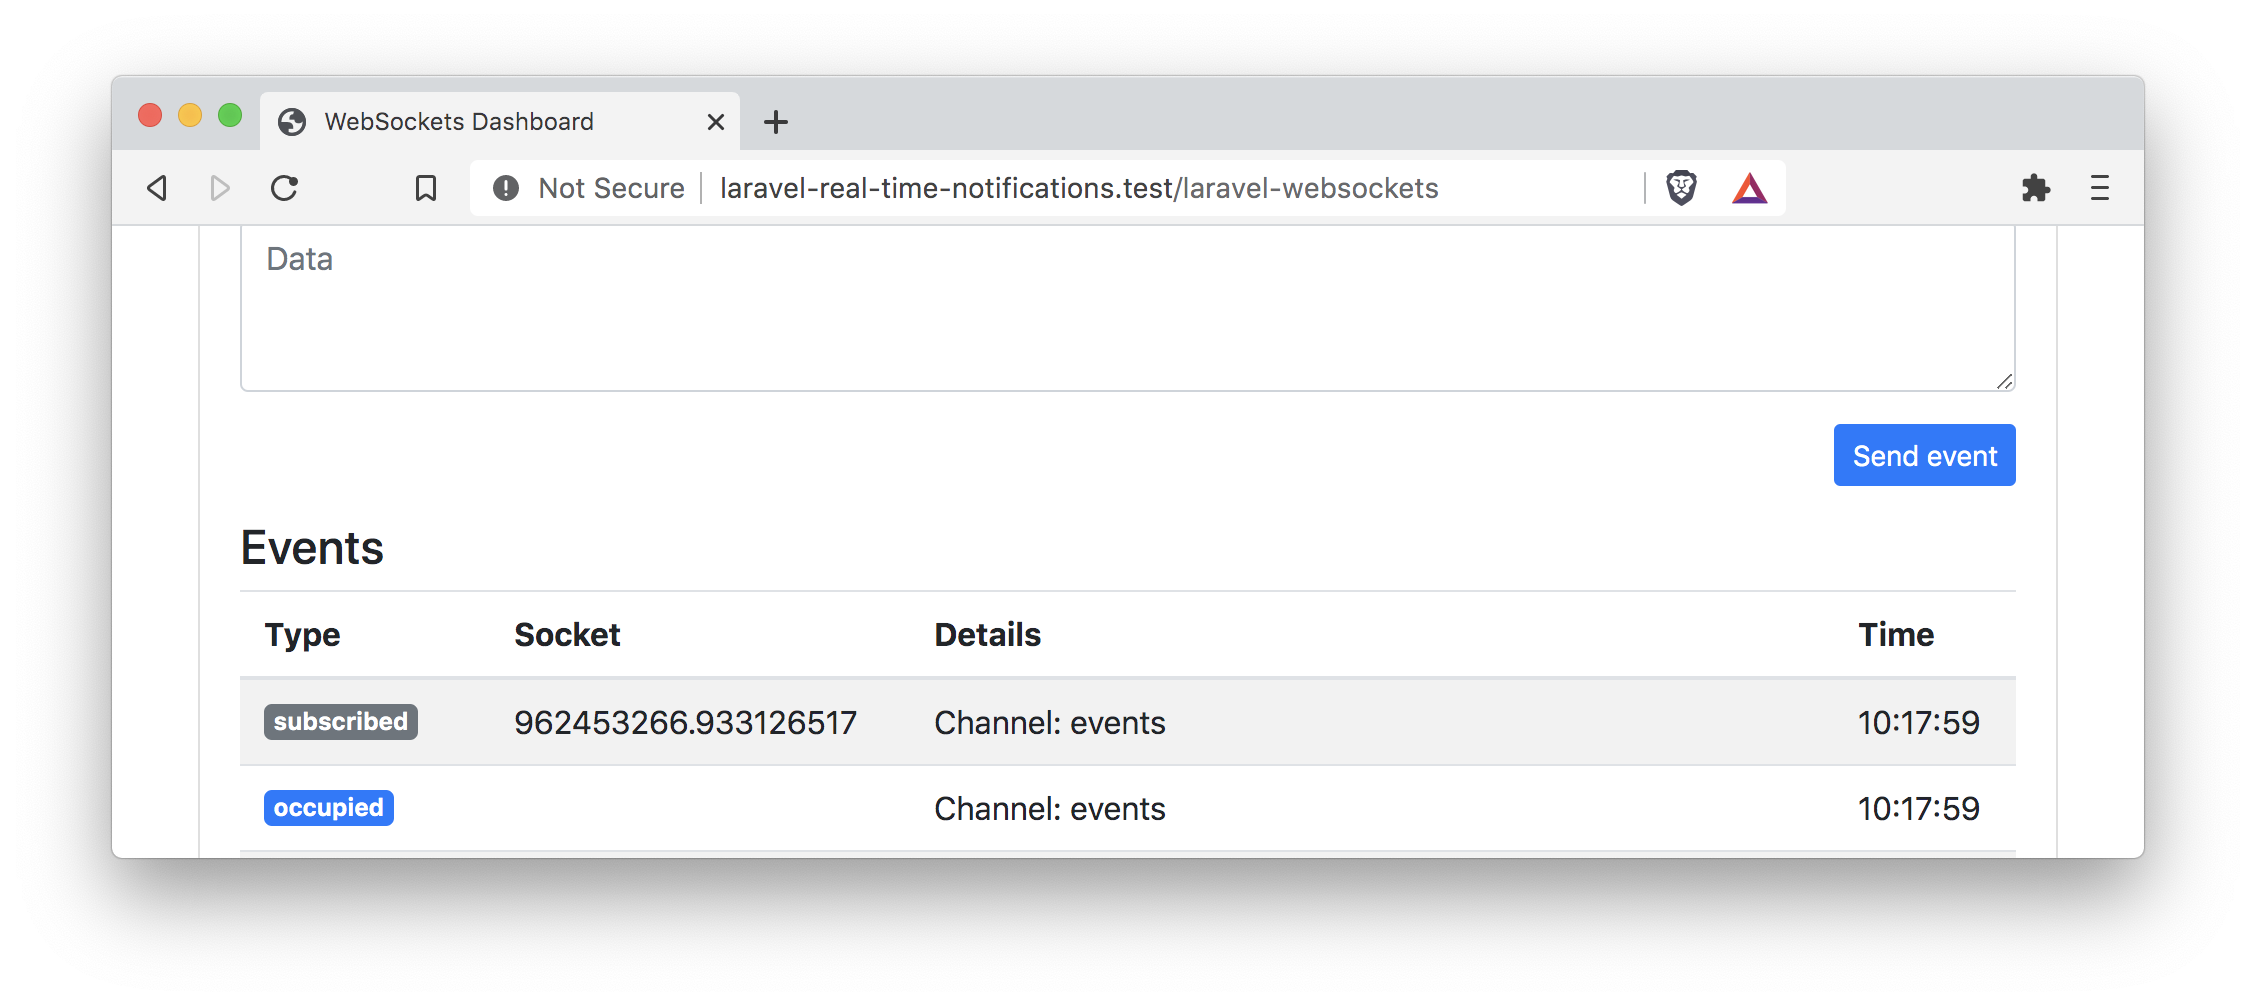
We can check the debugging dashboard under the endpoint /laravel-websockets to test its running. You can click Connect to see if the dashboard can connect to the WebSockets server.
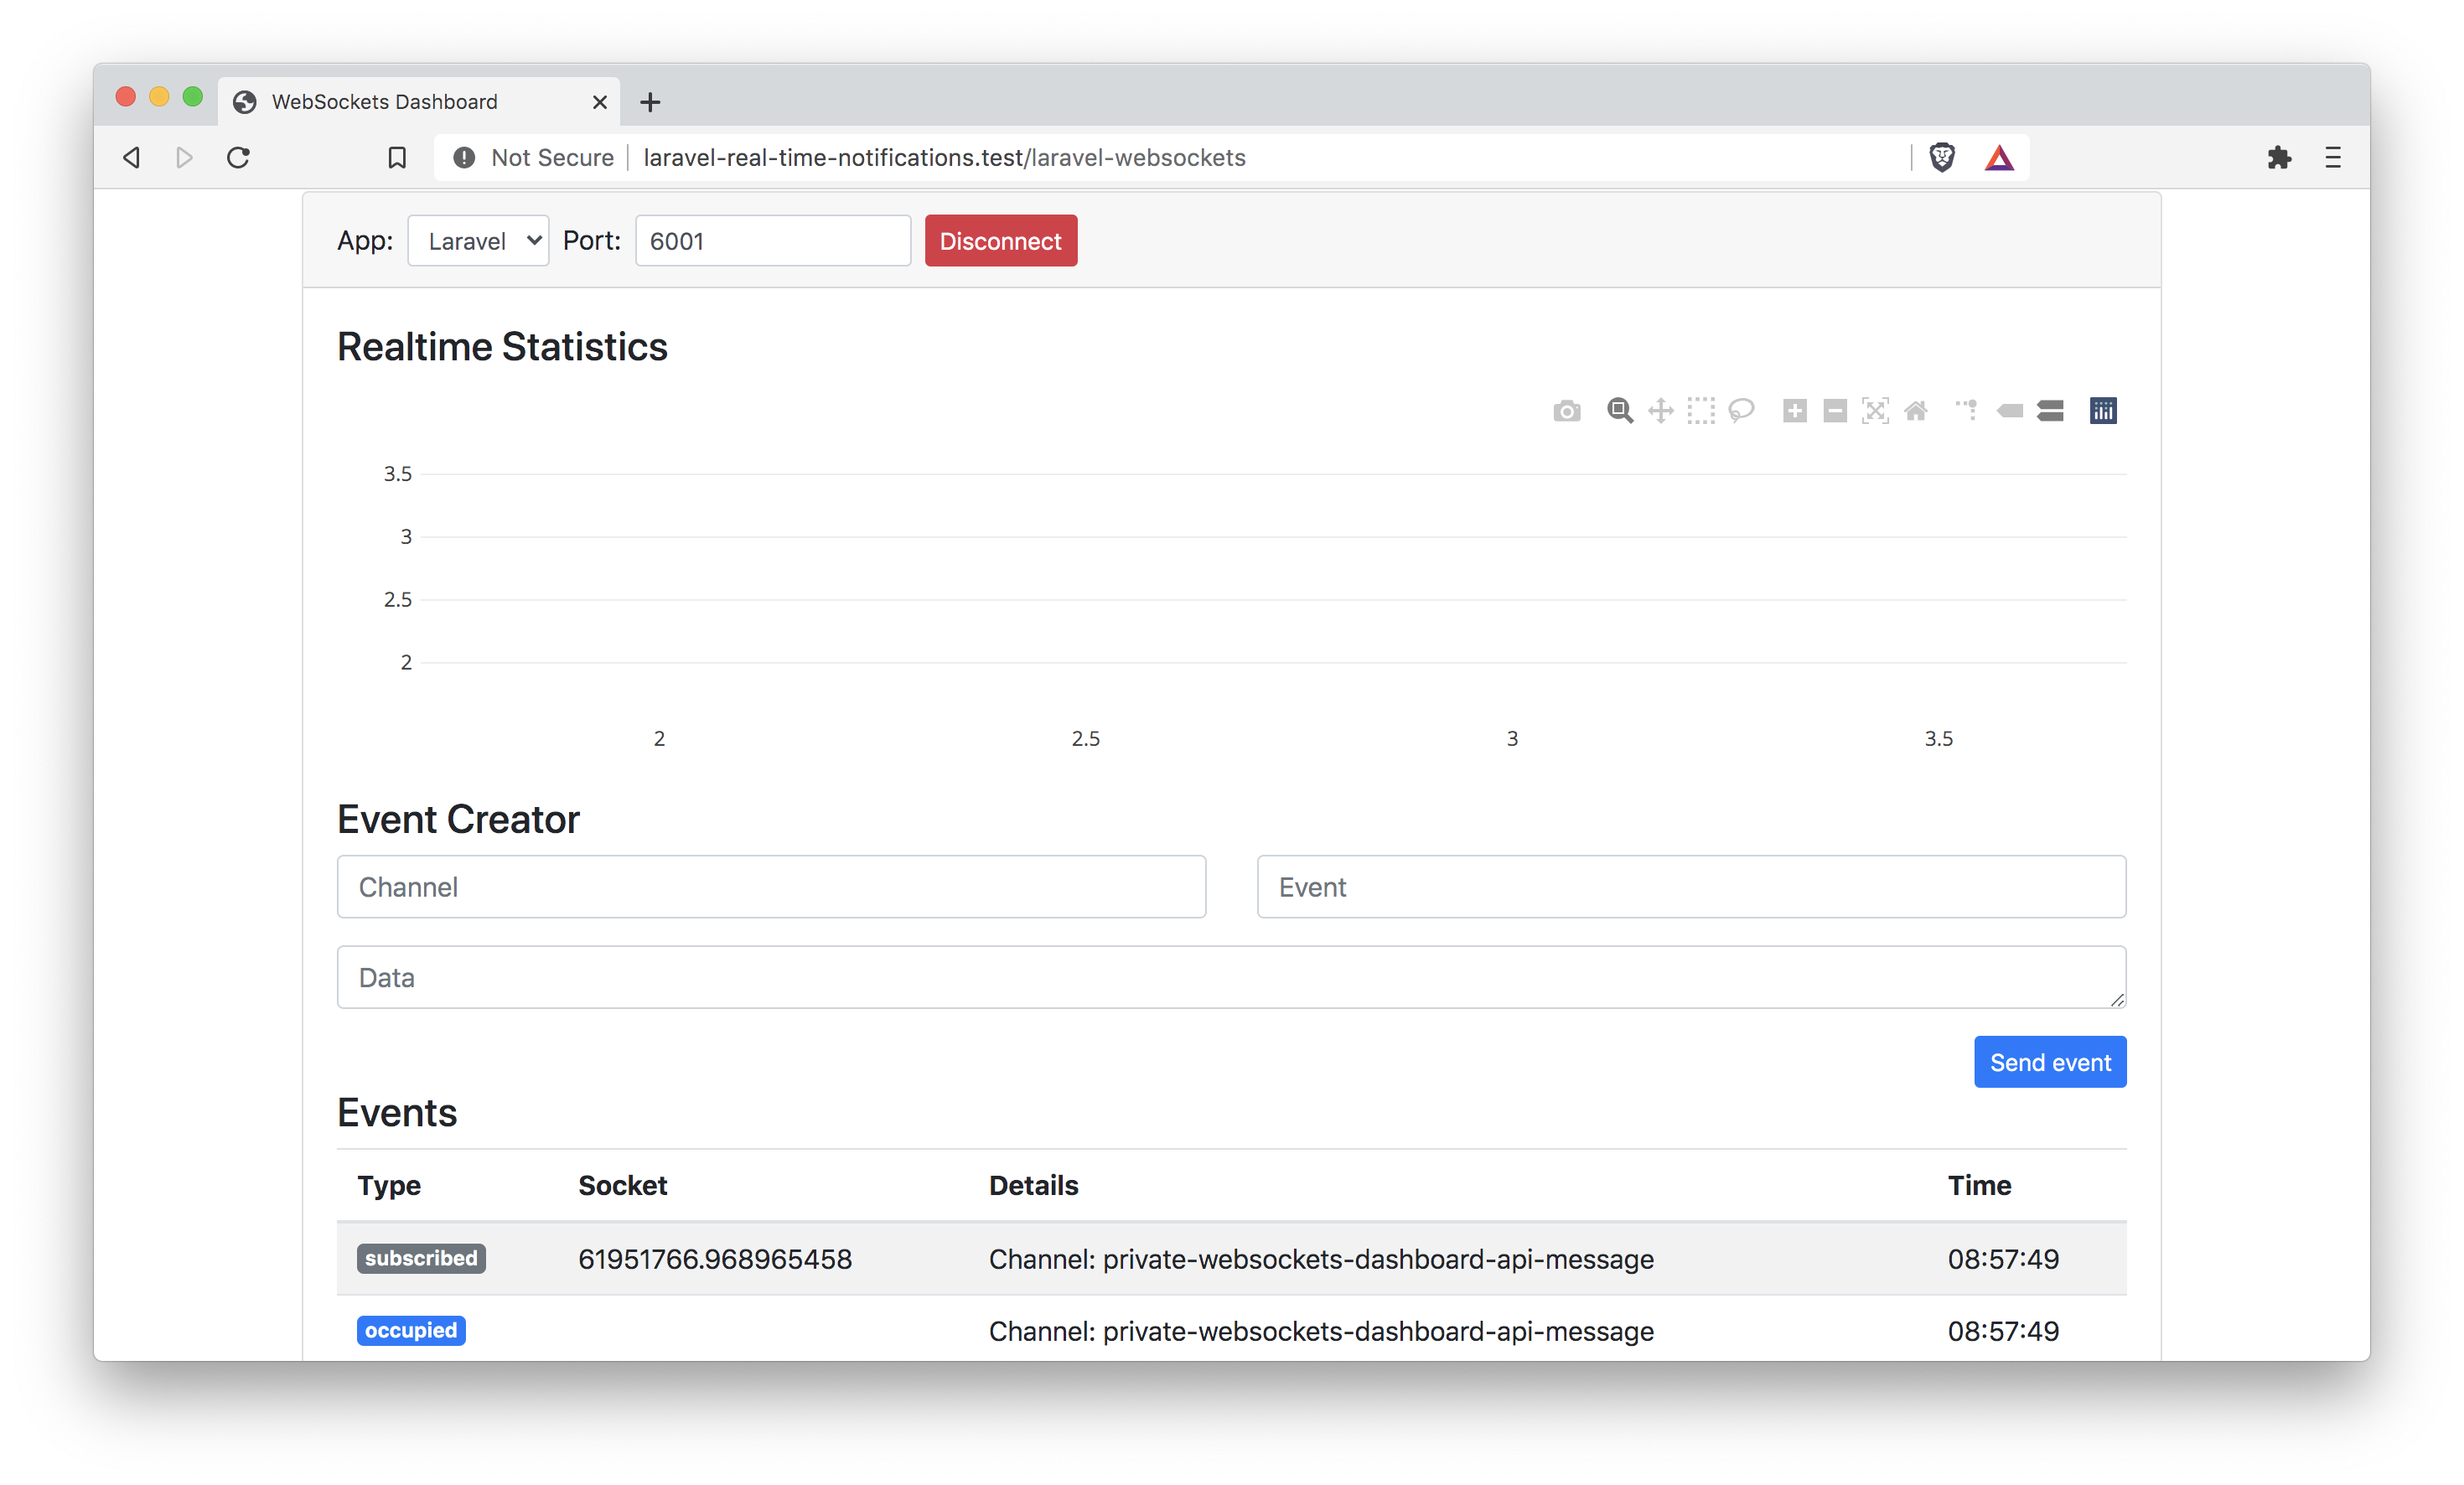
After clicking connect, you should see that the dashboard is subscribed to some debugging channels like private-websockets-dashboard-api-message. This will tell you that the server is set up correctly.
Broadcast Messages From Our Laravel Application With Events
There are two ways we can send messages from our backend to the WebSockets server:
- Laravel Events
- Laravel Notifications
We will start with events because this is a little easier. Later we will check notifications as well.
Let's create a new event with artisan.
php artisan make:event RealTimeMessage
Here is what we need to change:
- use the
ShouldBroadcastinterface - add a message property which we will pass through the constructor
- return a new
Channelinstead of aPrivateChannel - give the channel the name
eventsinstead ofchannel-name
<?php

namespace App\Events;

use Illuminate\Broadcasting\Channel;
use Illuminate\Contracts\Broadcasting\ShouldBroadcast;
use Illuminate\Queue\SerializesModels;

class RealTimeMessage implements ShouldBroadcast
{
    use SerializesModels;

    public string $message;

    public function __construct(string $message)
    {
        $this->message = $message;
    }

    public function broadcastOn(): Channel
    {
        return new Channel('events');
    }
}
Before we can try sending this event, please adapt your broadcasting.php config file to use the following options:
'options' => [
    'cluster' => env('PUSHER_APP_CLUSTER'),
    'encrypted' => false,
    'host' => '127.0.0.1',
    'port' => 6001,
    'scheme' => 'http'
],
With these options, we make sure that when we broadcast something from our Laravel application, it gets sent to our WebSockets server.
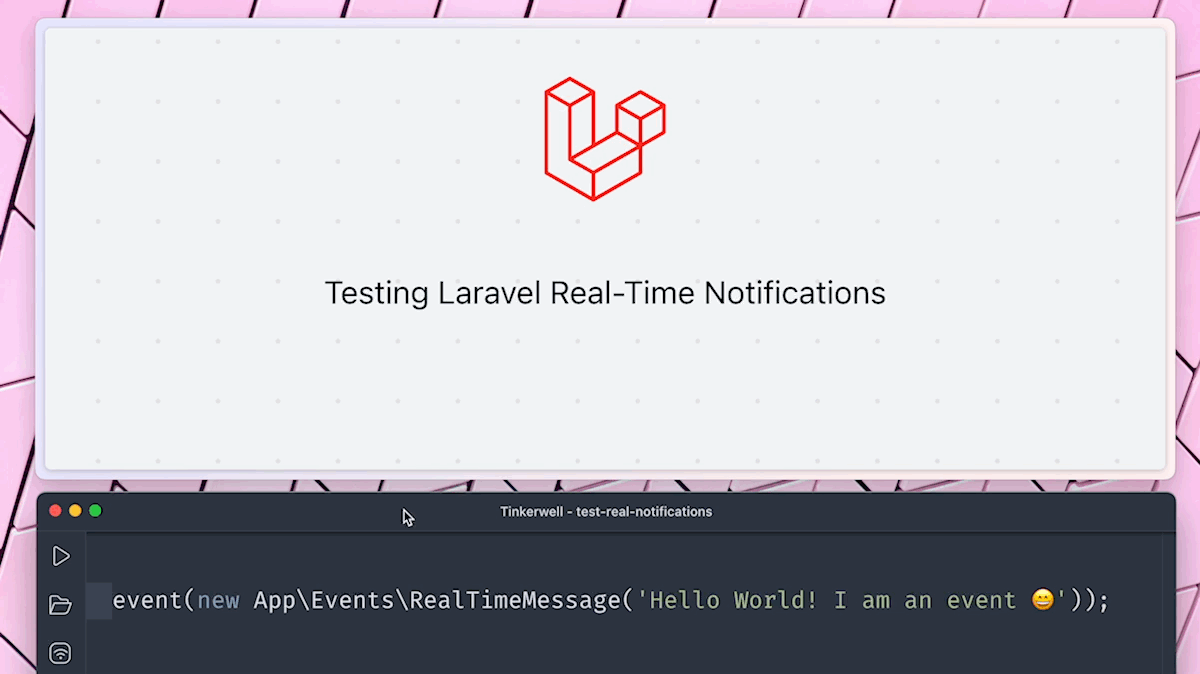
Now we can trigger our created event RealTimeMessage with the global event helper. I recommend using tinker or Tinkerwell, but you could also create a route and run the command there.
event(new App\Events\RealTimeMessage('Hello World! I am an event 😄'));
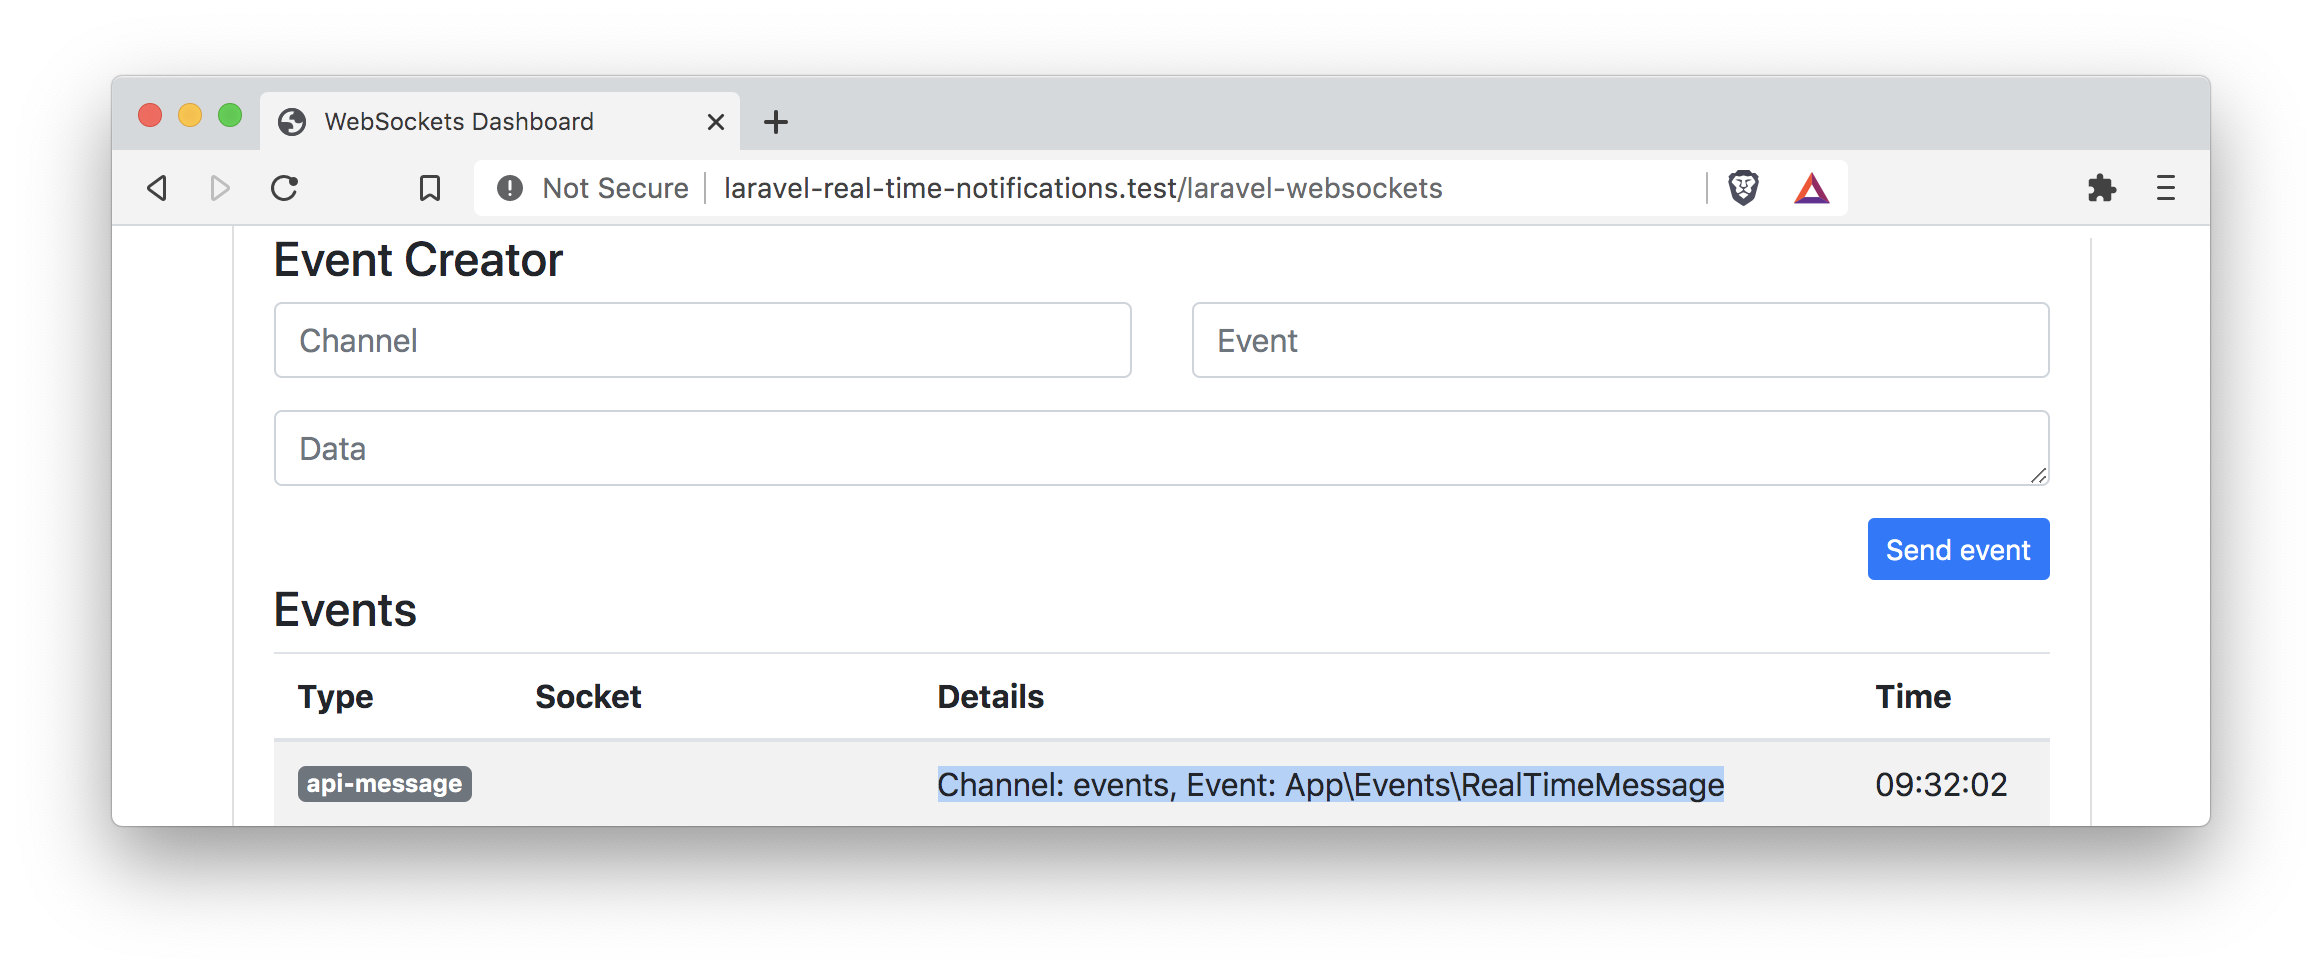
Of course, in an actual application, you would run this inside a controller or action class. After running this command, you should see a new entry on the debug dashboard.
Listen To Messages From Our Front-end
We have made sure that our sent event is broadcasted to the WebSockets server. But now we want to listen to it to use the message on our front end. We will use the JavaScript library Laravel Echo for that purpose.
Let's start by installing it with the pusher library, which we will also need.
npm install --save-dev laravel-echo pusher-js
The resouces/js/bootstrap.js file of Laravel already contains a code snippet for creating a new instance of Laravel Echo we can use. Comment it in and add the wsHost and wsPort.
import Echo from 'laravel-echo';

import Pusher from 'pusher-js';
window.Pusher = Pusher;

window.Echo = new Echo({
    broadcaster: 'pusher',
    key: import.meta.env.VITE_PUSHER_APP_KEY,
    cluster: import.meta.env.VITE_PUSHER_APP_CLUSTER ?? 'mt1',
    wsHost: import.meta.env.VITE_PUSHER_HOST ? import.meta.env.VITE_PUSHER_HOST : `ws-${import.meta.env.VITE_PUSHER_APP_CLUSTER}.pusher.com`,
    wsPort: import.meta.env.VITE_PUSHER_PORT ?? 80,
    wssPort: import.meta.env.VITE_PUSHER_PORT ?? 443,
    forceTLS: (import.meta.env.VITE_PUSHER_SCHEME ?? 'https') === 'https',
    enabledTransports: ['ws', 'wss'],
});
The bootstrap.js file is required by Laravel's main resources/js/app.js file. We must run npm run dev to bundle our Echo code with the main JS file.
Now import the script. We will use Laravel's welcome view for our tutorial. So add the app.js file into your view right before the end of the body tag.
<script src="{{ asset('js/app.js') }}"></script>
Also, open a new script tag where we create our Echo listener. We listen to the channel events and for the class name of the event we created. If we receive an update, we write a message to the console.
<script>
    Echo.channel('events')
        .listen('RealTimeMessage', (e) => console.log('RealTimeMessage: ' + e.message));
</script>
When you refresh the browser's welcome page, you should also get an update on the debug dashboard.
It shows that we are successfully subscribed to the events channel. This means we are ready to give it a real try!
Sending Real-Time Messages
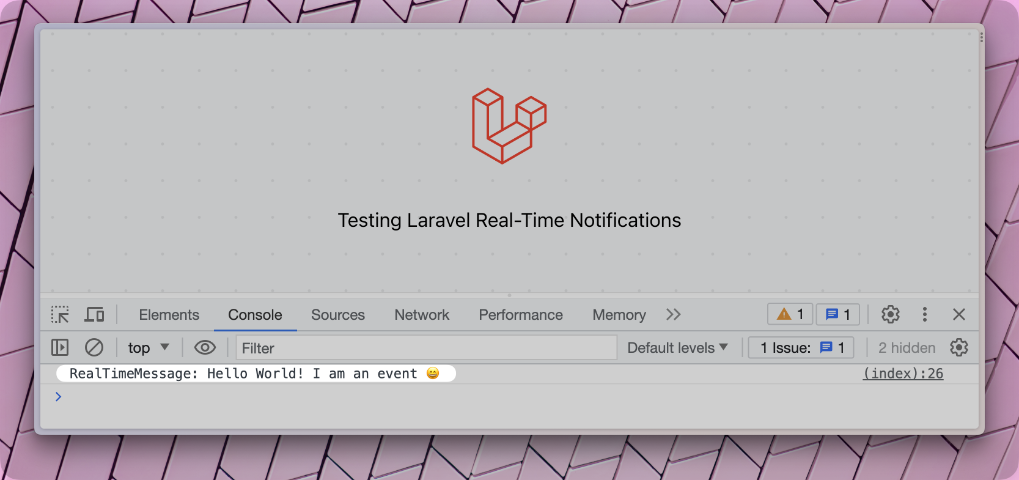
Now that we have prepared our event, the WebSockets server, and our JavaScript listener, we can try it. So back inside tinker or Tinkerwell, we can trigger our event again.
event(new App\Events\RealTimeMessage('Hello World'));
Now we see not only the message in the debug dashboard but also in the console output. So we received data on our front end without refreshing the page or making an Ajax call. This is our first real-time message. 🥳
Let's Use a Private Channel
Next to sending messages to a public channel, we can also use a private one with events. Let's change our RealTimeMessage event to use a private channel.
public function broadcastOn(): Channel
{
    return new PrivateChannel('events');
}
Now send the event again.
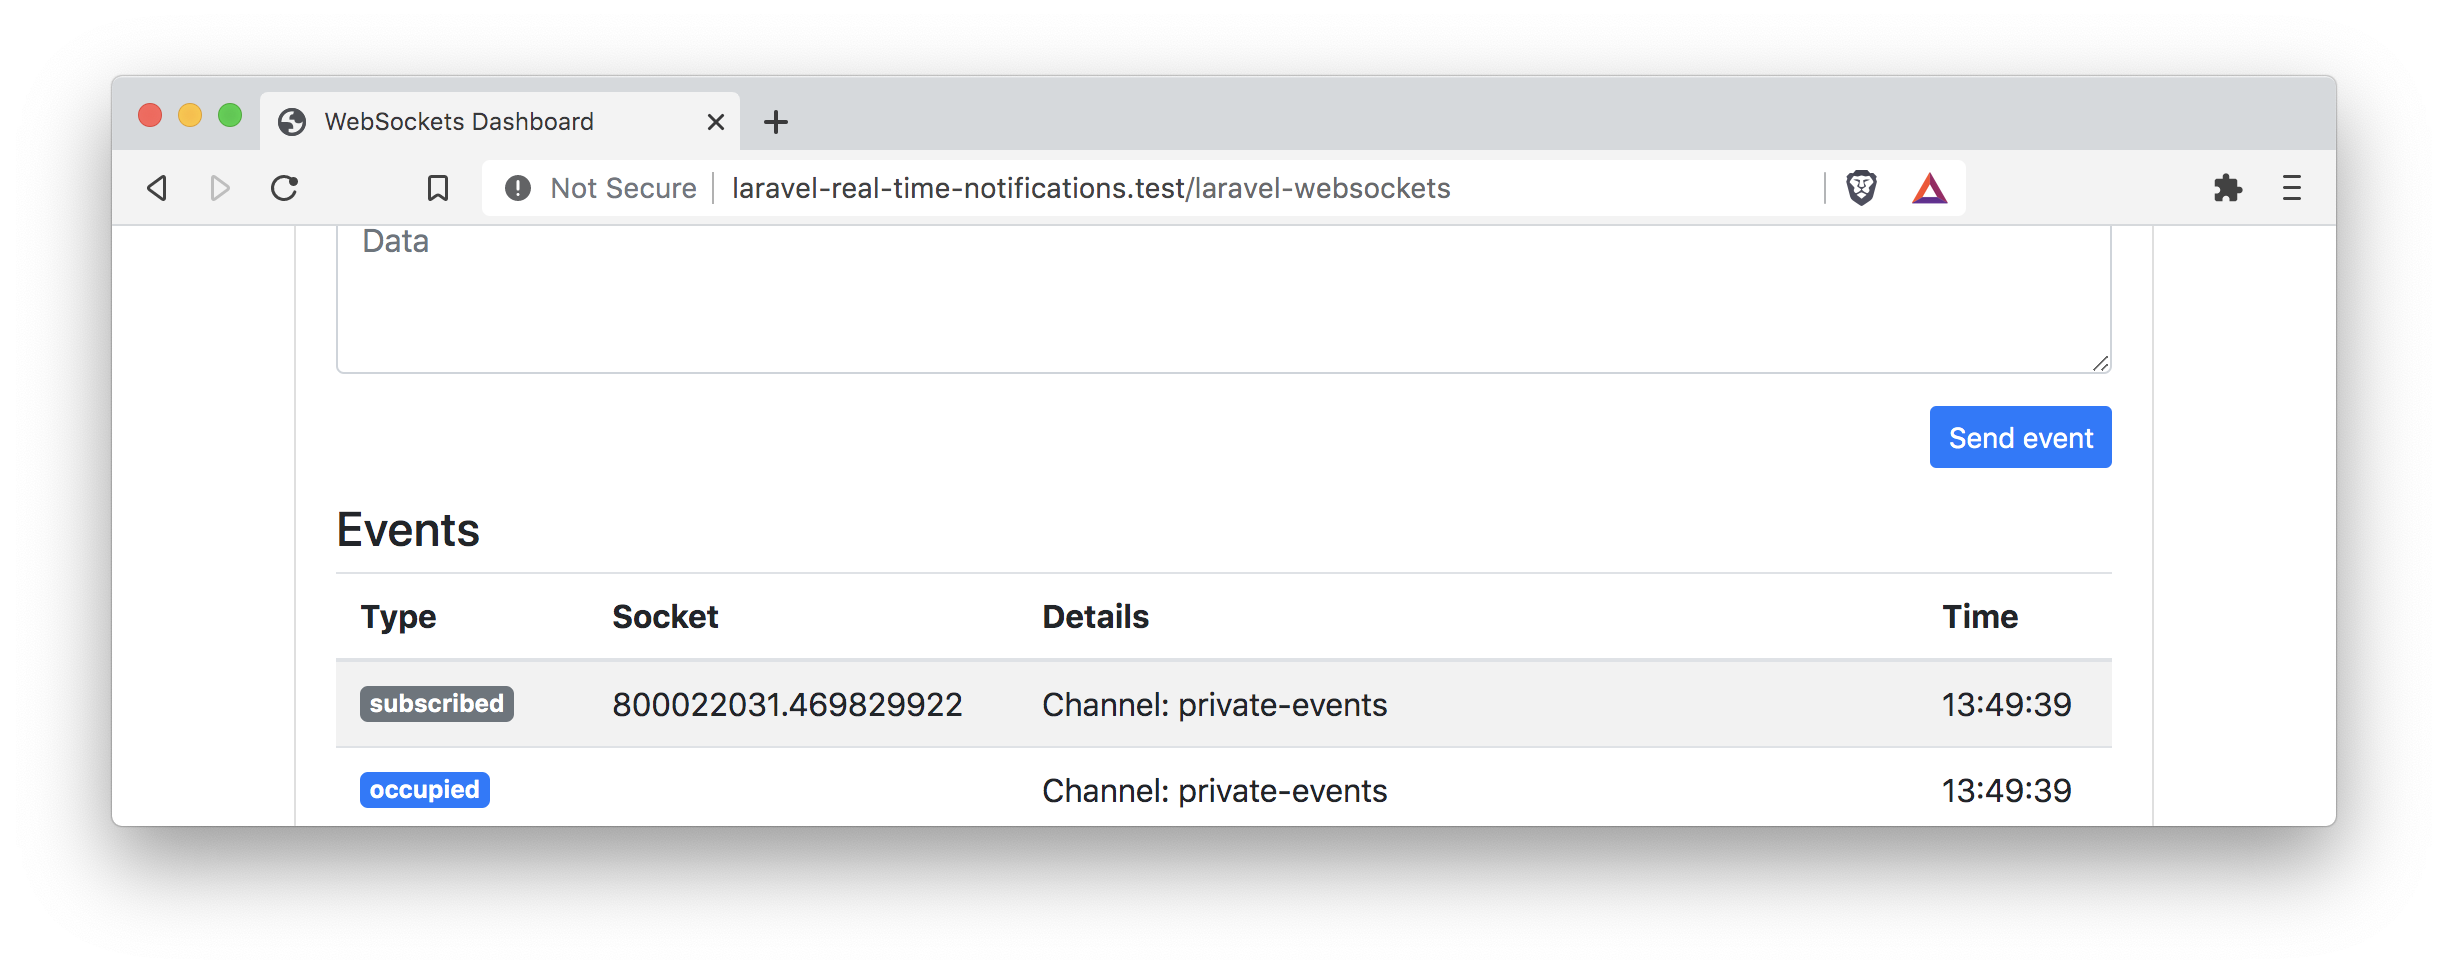
As you can see in the debug dashboard, our message was now sent on a private channel. Nice! But now we also need to listen to a private channel. Luckily, Laravel Echo lets us also change the channel method to private.
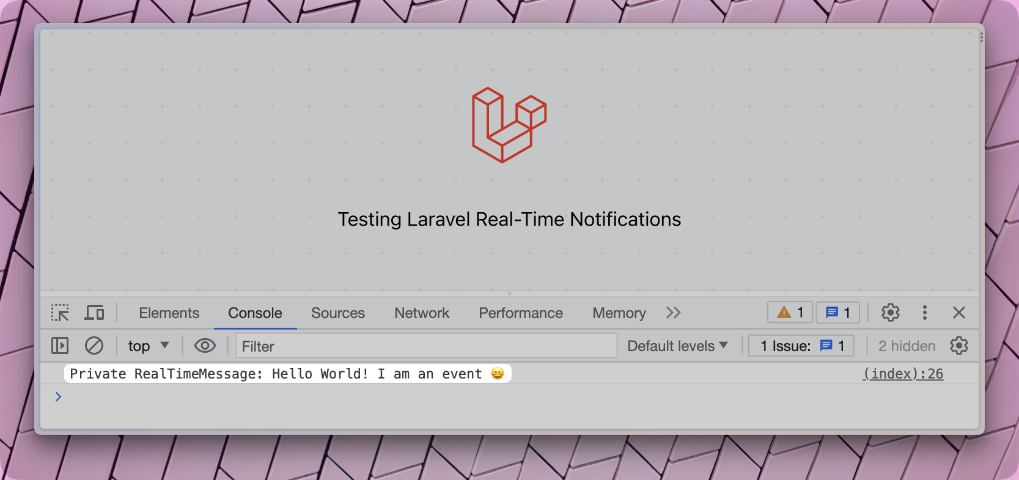
Echo.private('events')
    .listen('RealTimeMessage', (e) => console.log('Private RealTimeMessage: ' + e.message));
But when you refresh the welcome page, you see that we get an error.
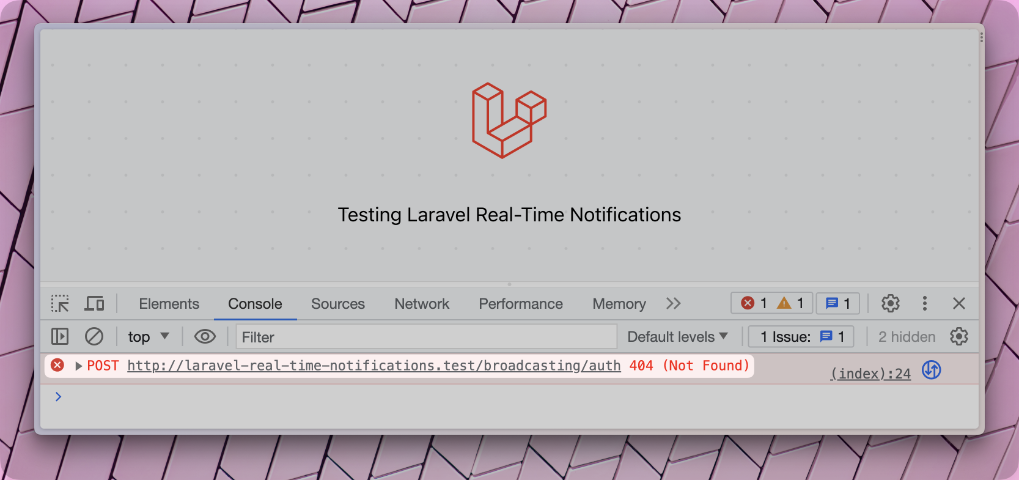
The problem here is that private channels need to be authenticated. That's what Laravel Echo is trying to do by requesting the /broadcasting/auth endpoint. But the endpoint is not defined. We need to include it by uncommenting the BroadcastServericeProvider in our app.php config file.
/*
 * Application Service Providers...
 */
App\Providers\AppServiceProvider::class,
App\Providers\AuthServiceProvider::class,
App\Providers\BroadcastServiceProvider::class, // We enabled this class
App\Providers\EventServiceProvider::class,
App\Providers\RouteServiceProvider::class,
Refresh the page again, and you will see the error from before is gone, but of course, there is a new one :-)
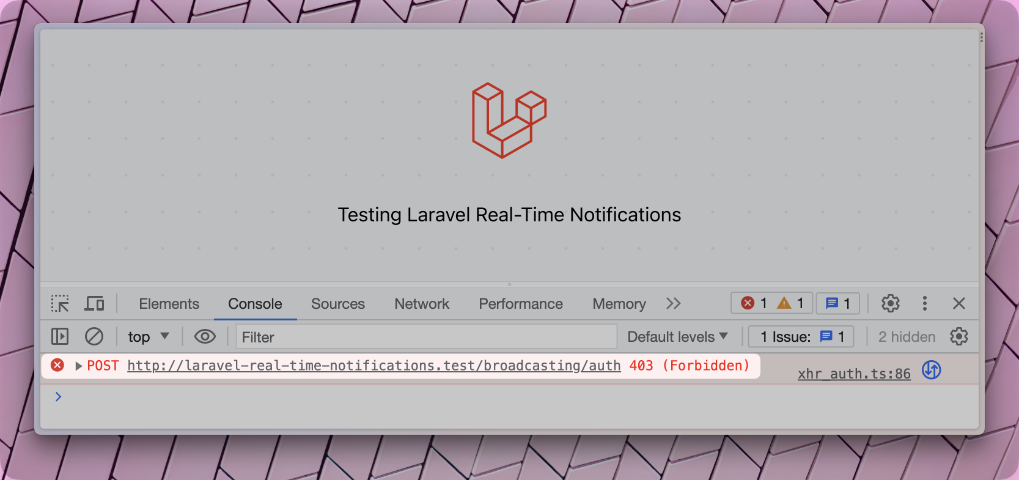
This time we received a 403 error telling us we could not listen to the private channel. This is good because we haven't told Laravel who can listen to this private channel yet.
Next to the broadcast routes, the BroadcastServiceProvider also activates the routes/channels.php file. Here is where we define who is allowed to access a private channel. There is an example, but we add our own now.
Broadcast::channel('events', function ($user) {
    return true;
});
We tell Laravel we do not have specific rules for authenticating who can subscribe to our private channel. But when you refresh the welcome page, you will still see a 403 error. This is because one thing is the same for every private channel: There must be a logged-in user.
So let's add a new user to the database. I'm using Tinkerwell again here. We do not care about the user details.
User::create([
    'name' => 'Test user',
    'email' => 'test@test.at',
    'password' => bcrypt('test'),
]);
We can log this user into our application before we return the welcome view in the web.php route file. Also, make sure to import the User class before you use it.
Route::get('/', function () {
    auth()->login(User::first());

    return view('welcome');
});
This will log in the first user from our users table. Reload the welcome page, and you will no longer find an error in the console. You will also see that we are now subscribed to the private events channel in the debug dashboard.
Trigger the event again, and we will receive the private message output in the console.
event(new App\Events\RealTimeMessage('Hello World'));
Broadcast Messages From Our Laravel Application With Notifications
The title of this blog contains Notifications, so what about them? You might know I'm a big fan of Laravel's notification system, so we are talking about them too.
So next to events, we can use notifications to send data to our WebSockets server. So let's create a new one.
php artisan make:notification RealTimeNotification
Here is what we need to change:
- use the
ShouldBroadcastinterface - add a message property which we will pass through the constructor
- use the
broadcastchannel in theviamethod - add a
toBroadcastmethod to define the message
<?php

namespace App\Notifications;

use Illuminate\Contracts\Broadcasting\ShouldBroadcast;
use Illuminate\Notifications\Messages\BroadcastMessage;
use Illuminate\Notifications\Notification;

class RealTimeNotification extends Notification implements ShouldBroadcast
{

    public string $message;

    public function __construct(string $message)
    {
        $this->message = $message;
    }

    public function via($notifiable): array
    {
        return ['broadcast'];
    }

    public function toBroadcast($notifiable): BroadcastMessage
    {
        return new BroadcastMessage([
            'message' => "$this->message (Message for $notifiable->name))"
        ]);
    }
}
Since notifications are always connected to a notifiable model (like a user), we can access it inside the toBroadcast method. This way I can add the user id to the message we sent.
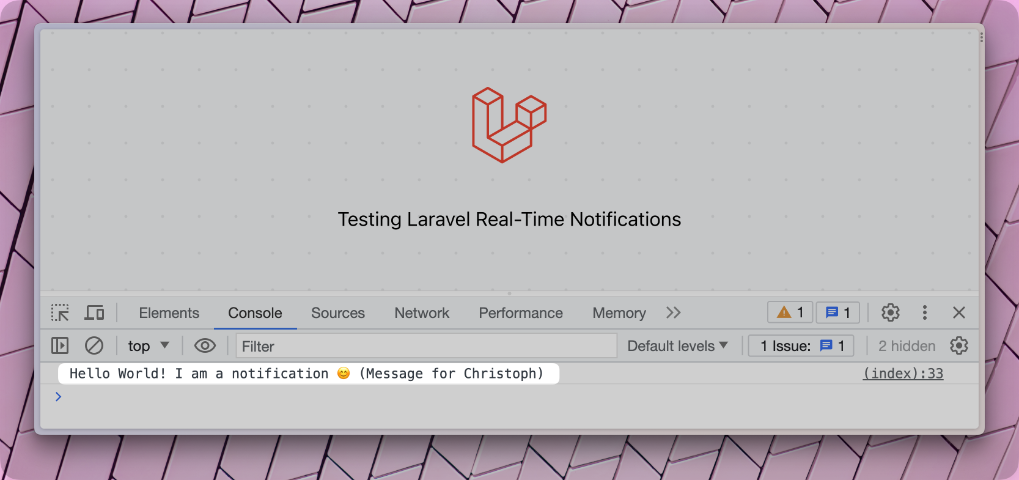
Alright, time to trigger our notification. Again, we are using the one user we have in our database.
$user = User::first();

$user->notify(new App\Notifications\RealTimeNotification('Hello World! I am a notification 😄'));
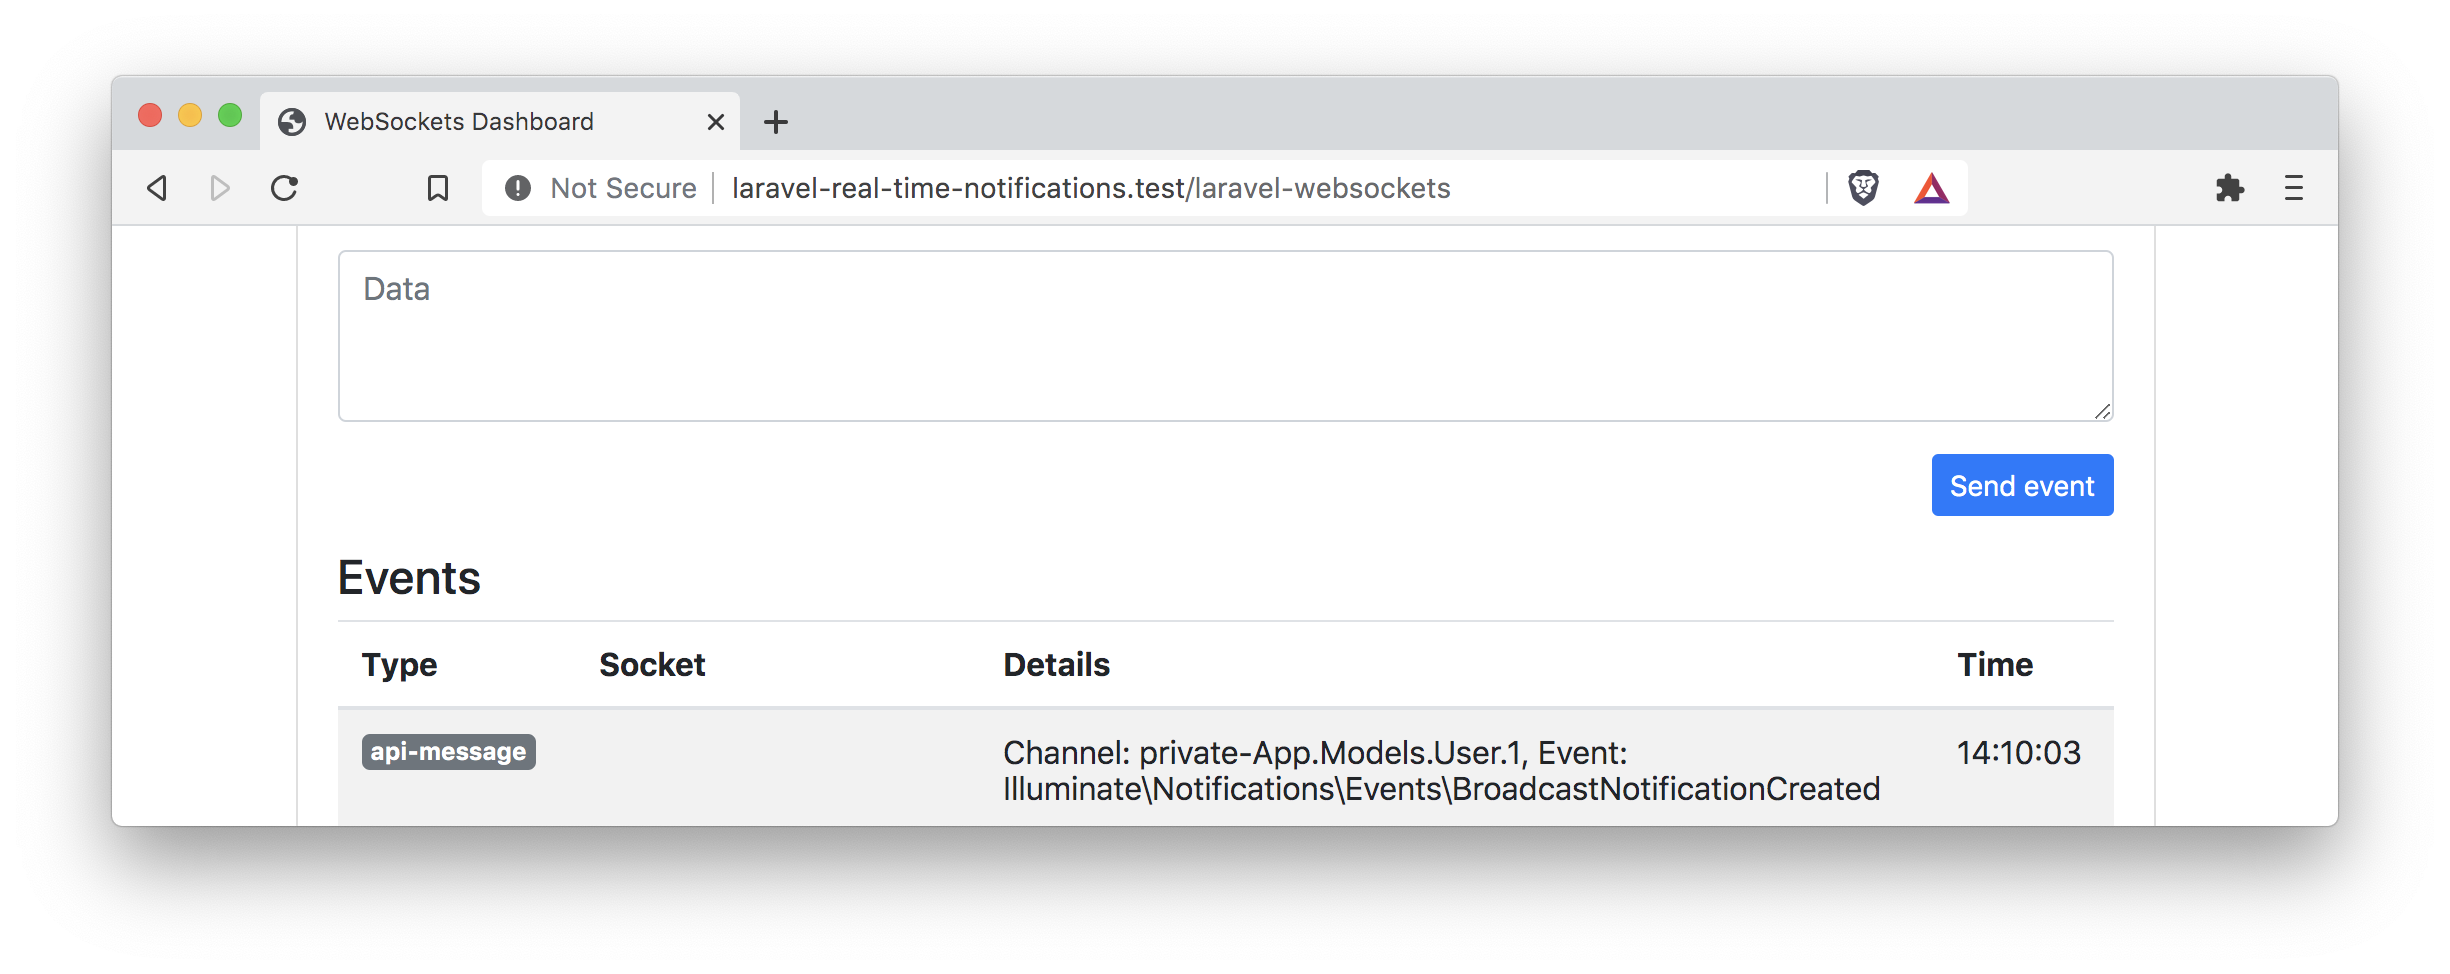
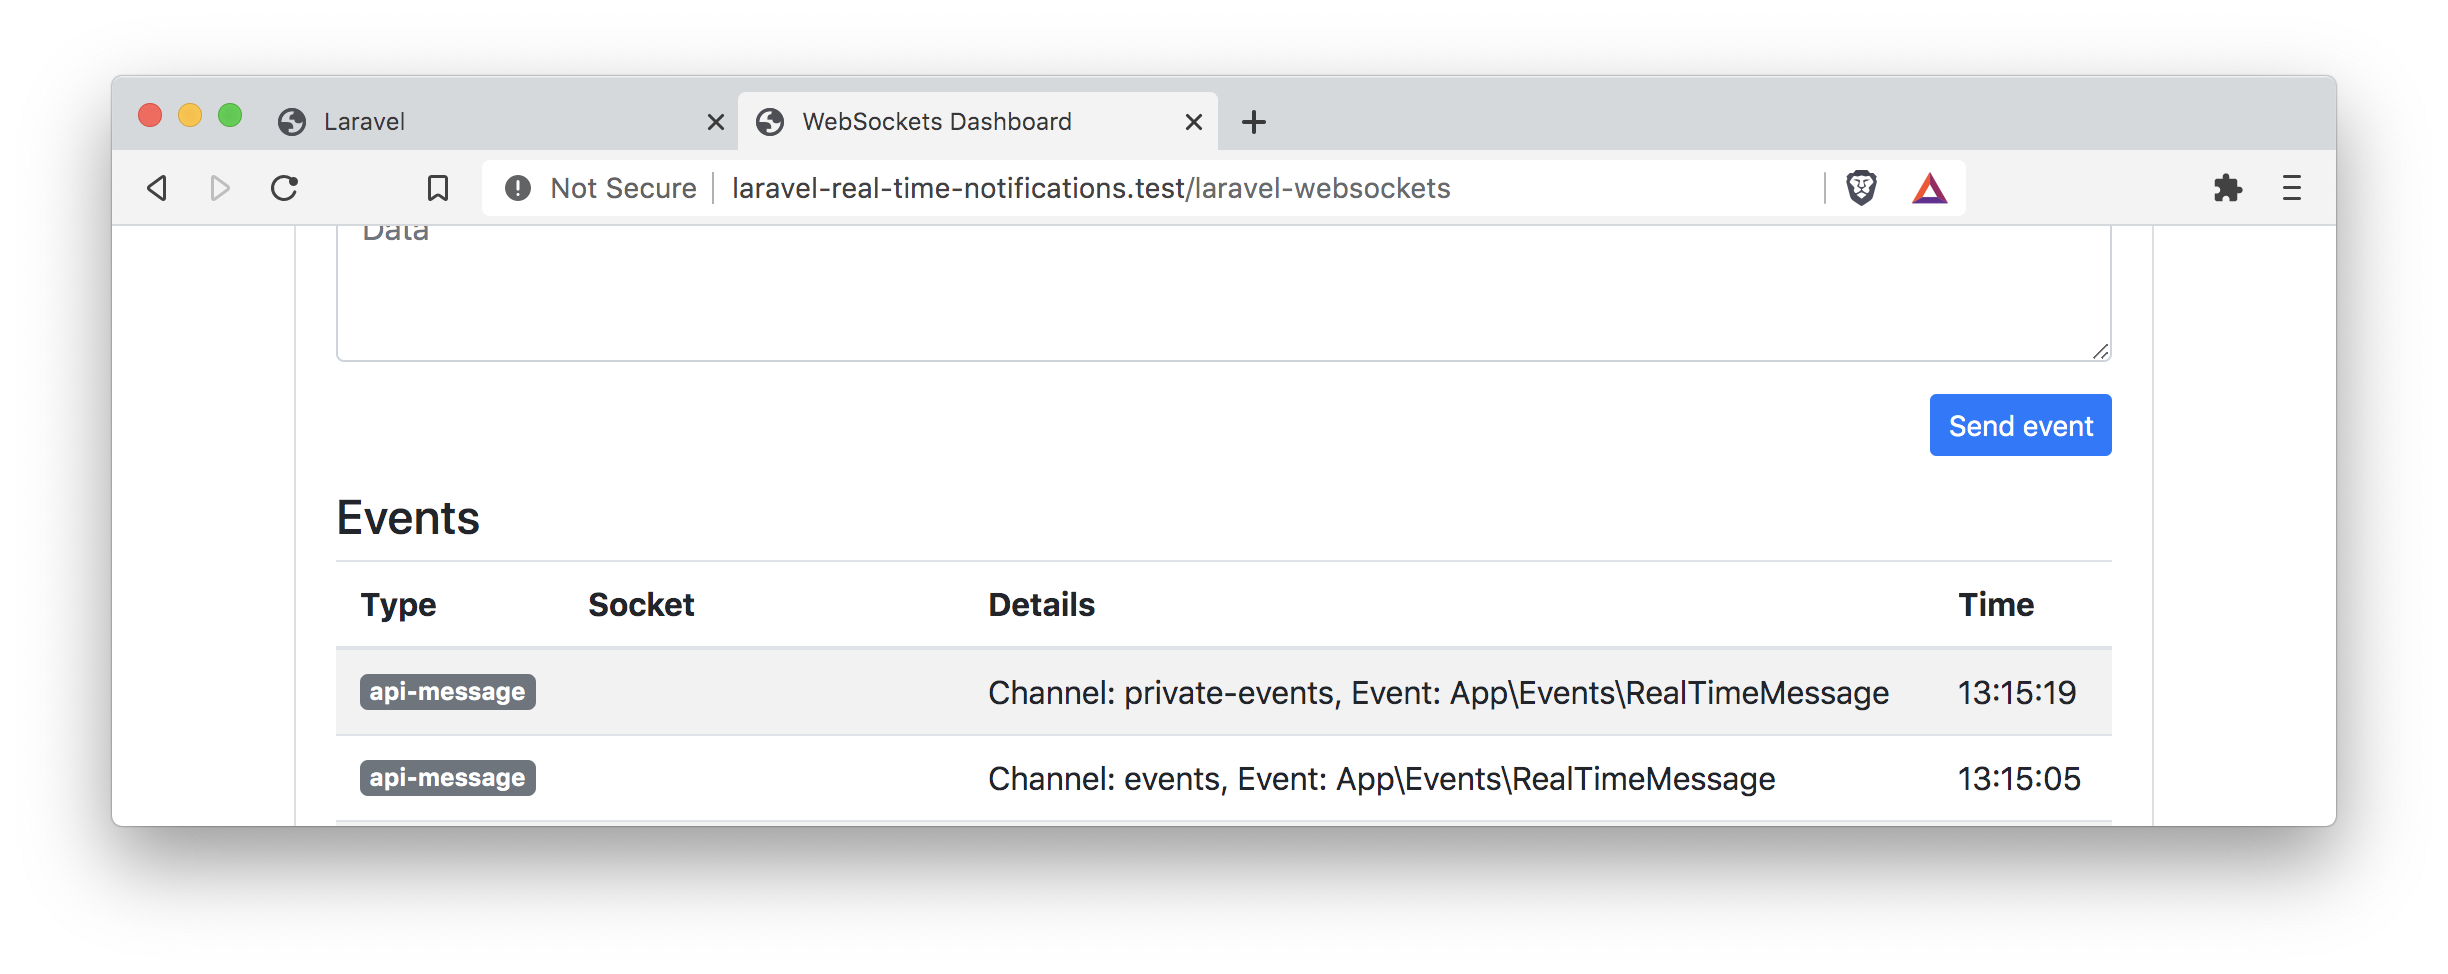
You probably noticed that we did not define a channel name with our notification as we did in our event. This is because there is a default pattern for the channel name of a notification notifiable-class.key. In our case, this would be App.Models.User.1. And when you take a look at the Web dashboard, you find a message triggered by our notification to the channel Channel: private-App.Models.User.1.
Next, let's subscribe to this channel on our front end. Laravel Echo has a notification method we can make use of.
Echo.private('App.Models.User.1')
    .notification((notification) => {
        console.log(notification.message);
    });
You should be able to refresh the welcome page now without seeing any errors. Since we are using a private channel again, Laravel Echo will try to authenticate our subscribing request to this channel. This is where the other code snippet from the channels.php file comes into play.
Broadcast::channel('App.Models.User.{id}', function ($user, $id) {
    return (int) $user->id === (int) $id;
});
When you try to subscribe to a specific user's private channel, it will ensure that the provided id is the same as the logged-in user. You can quickly force an error when you try to listen to a different user id like:
Echo.private('App.Models.User.99')
    .notification((notification) => {
        console.log(notification.message);
    });
When you refresh the welcome page, you will see we get a 403 error again. But let's finish this example by triggering the notification also now.
And this is how we can broadcast real-time messages with notifications as well. The benefit of notifications is that you can send them through multiple channels. So you can send a real-time message to the user's dashboard about a newly created invoice and send an email while only using one notification class.
More Tips & Tricks
SSL Support
Of course, you will use a secure connection with your live applications. Please check out to official docs for SSL support for Laravel Websockets.
Events Or Notifications
As I showed you, both options give you much flexibility when sending real-time messages. I'd recommend notifications if you already work with logged-in users in your application.
If you do not work with users/notifiables in your application, events give you an excellent way of sending messages to a channel you can define.
Conclusion
I hope this long article could give you a great start to real-time messaging with Laravel. Am I missing more details? What are your thoughts on Laravel and real-time messaging? Let me know on Twitter.
As always, make sure to check the official docs for all the tools we used today:
Our demo application's code can be found in this repository.