Build a PHP chatbot in 10 minutes
#chatbotsI'm too old for this sh**.
This post has already become quite old, and a lot has changed in that field since I wrote it. The examples I provide might not work anymore or are not suitable for how we work today. Please be aware of that while reading it.
The chatbot topic is huge right now. Finally, there is something quite new again, and nobody knows what's happening next. This is the perfect chance to start experimenting with chatbots and to build your own one right now. Give me 10 minutes of your time, and I will give you your first chatbot!
Shortcut
If you just want to see the code, check it out on Github. If you're interested in more about chatbots and PHP, check out my book.
The perfect entry point
To make your first chatbot experience a good one, I built a boilerplate for working in PHP. It includes everything you need to know to connect your application to a messenger platform. You will find simple examples to reply to chat messages in different ways.
Additionally this boilerplate support the NLP platform Dialogflow. This will help you to process and understand the user's intent.
Requirements
- PHP 7
- Composer
Supported messenger platform
- Facebook Messenger
Covered
- Create an FB Messenger app
- Create an FB Page
- Setup the Chatbot PHP Boilerplate
- Create a webhook
- Connect the Facebook app to the Facebook page
- Simple Dialogflow example
- Simple wit.ai example (removed)
Not covered
- How to use Dialogflow
- How to use wit.ai
Installation
Create a FB page
First login to Facebook and create a Facebook page. The page doesn't need to be public. Choose the settings that fit best your bot, but for testing, it is not essential.
Create an FB Messenger app
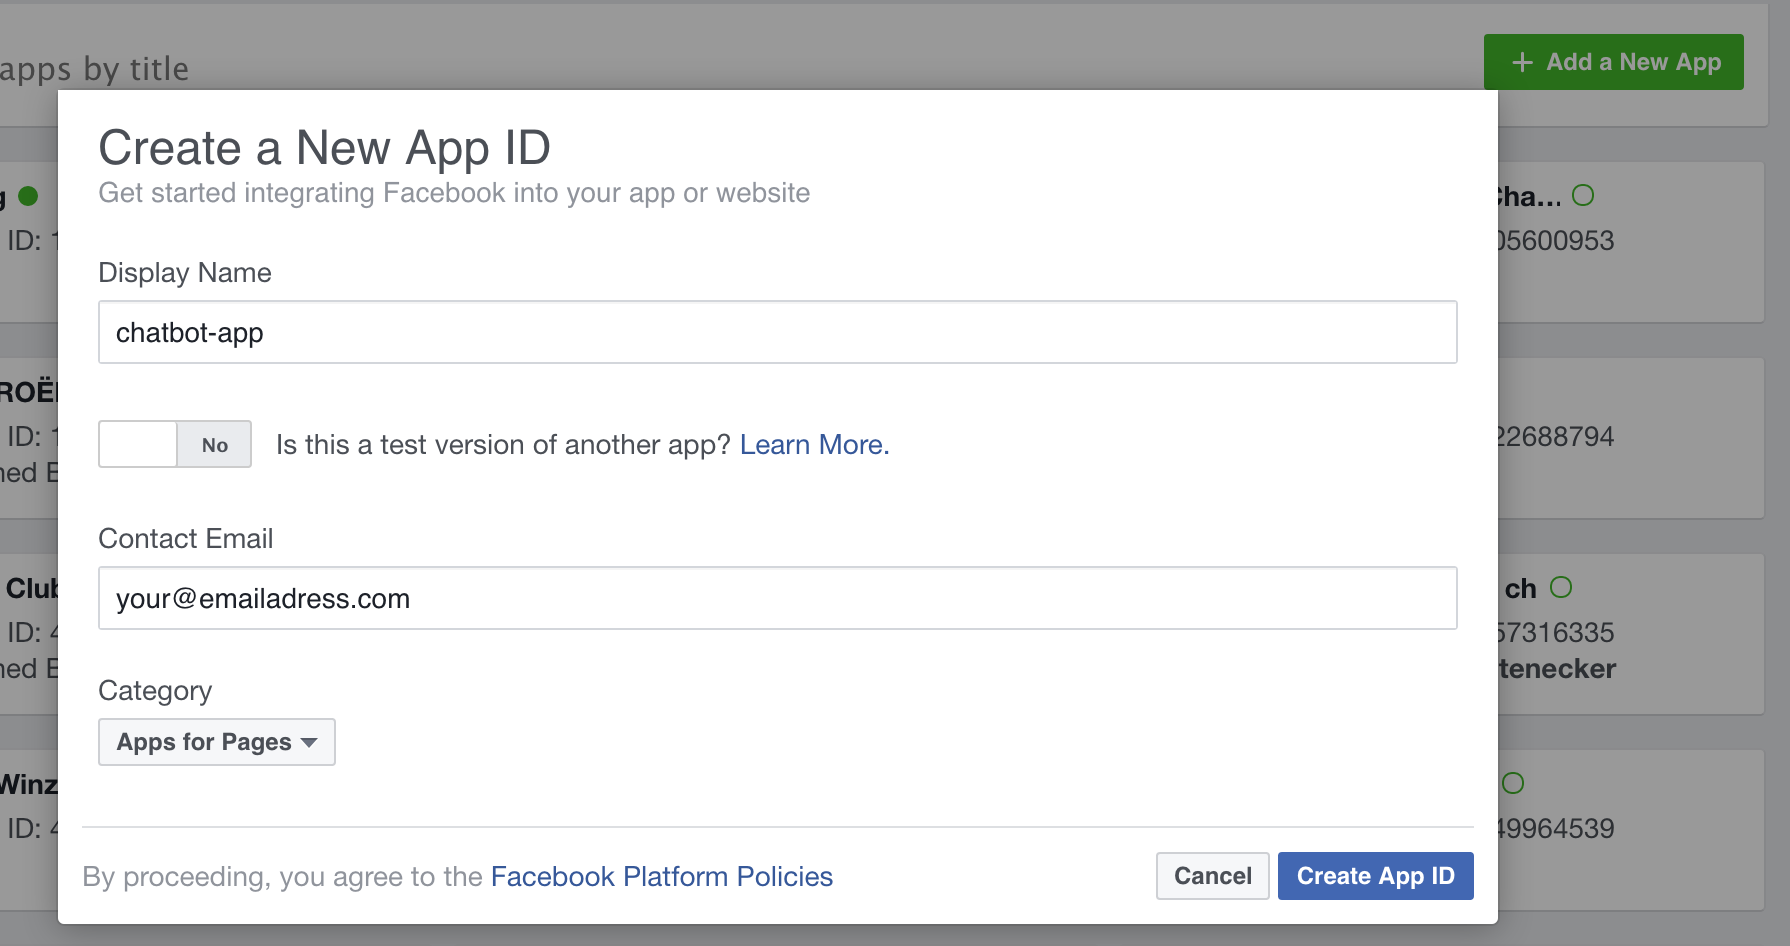
Go to the developer's app page. Click "Add a New App" and fill the basic app fields.
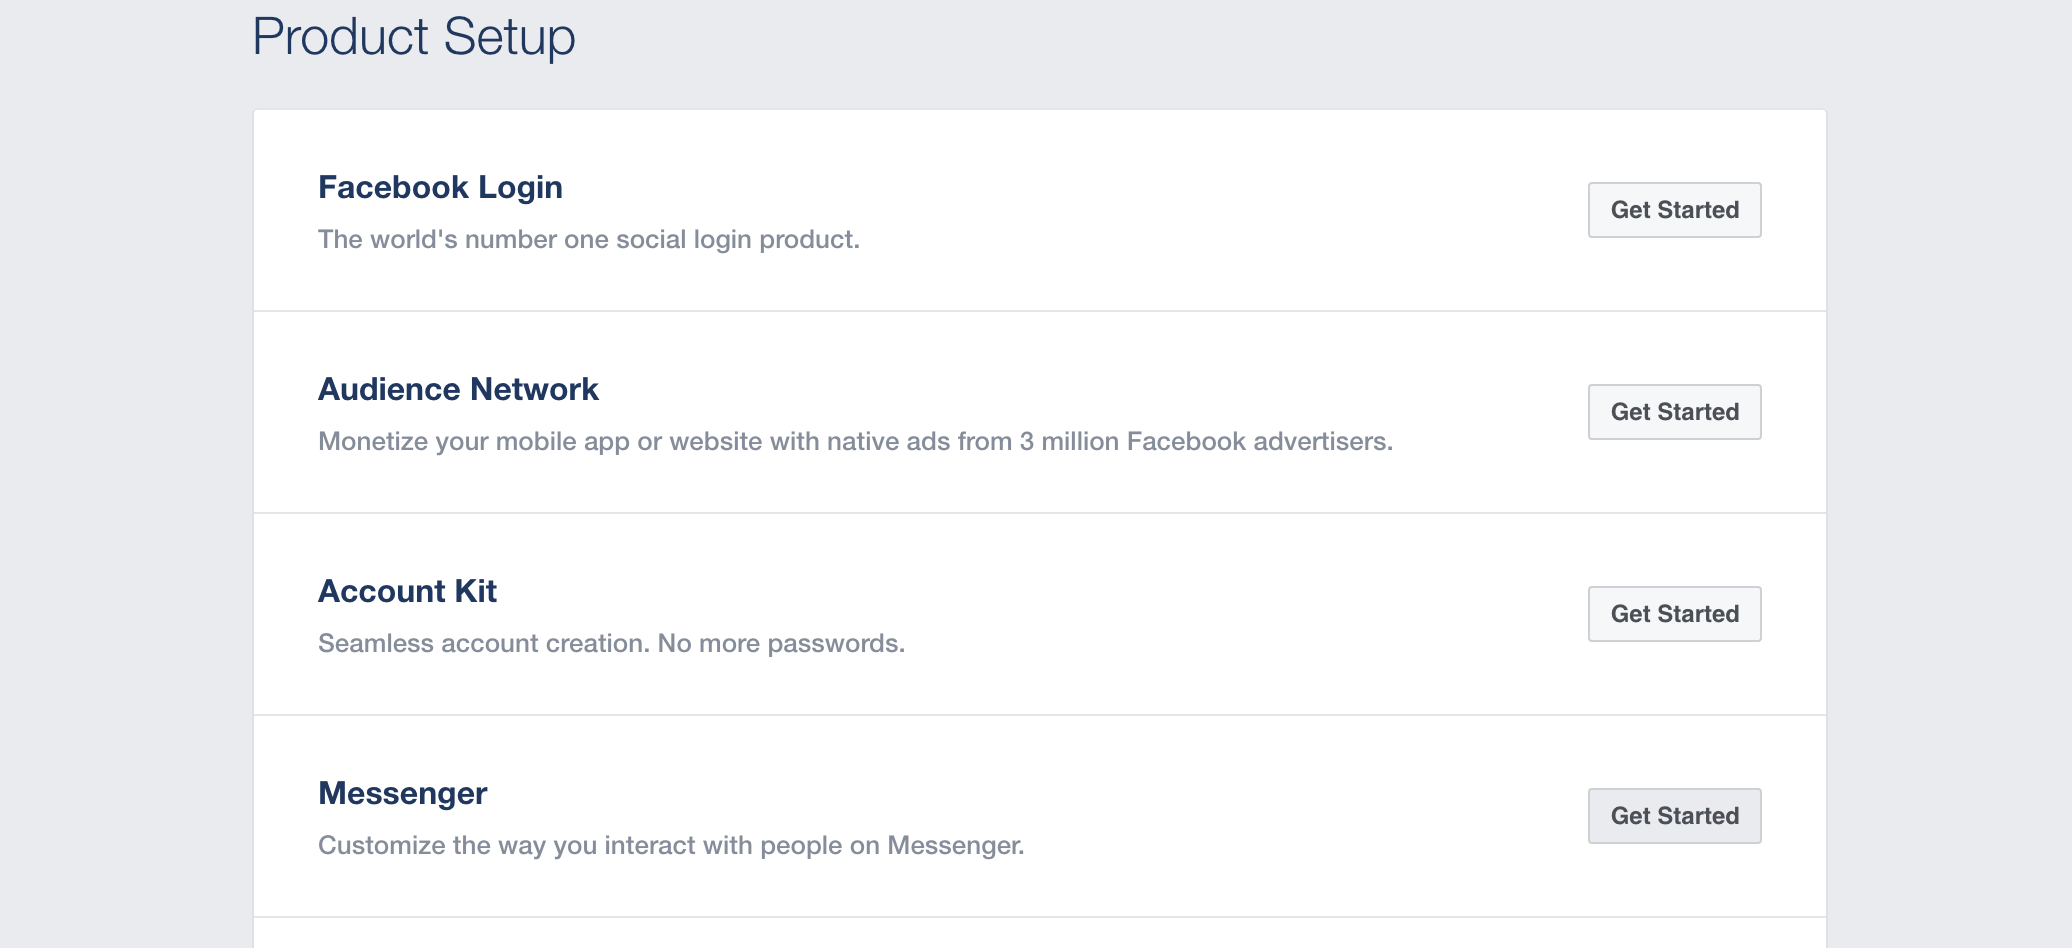
On the "Product Setup" page choose Messenger and click "Get Started."
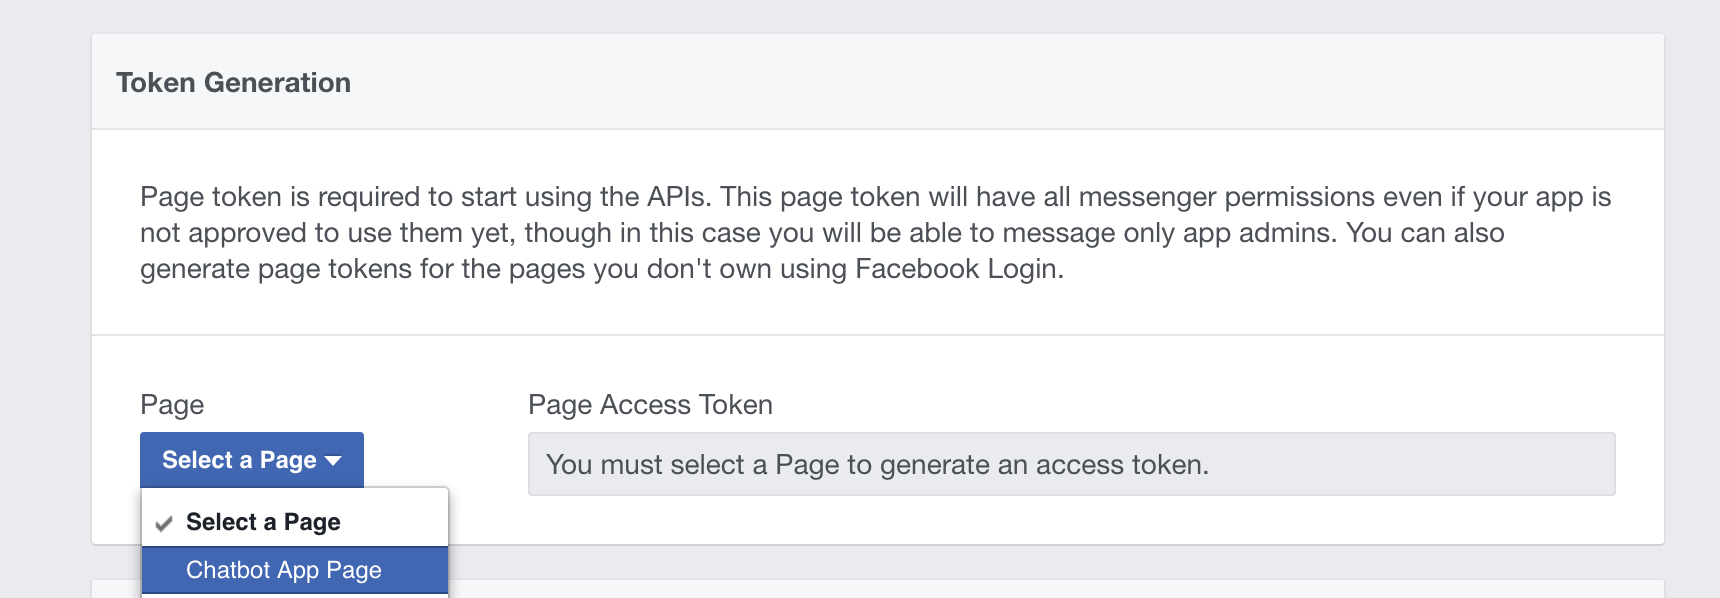
Now we need to create a token to give our app access to our Facebook page. Select the created page, grant permissions and copy the generated token. We need that one later.
Setup the Chatbot PHP Boilerplate
First, clone the repository and remove the existing git folder.
git clone git@github.com:christophrumpel/chatbot-php-boilerplate.git chatbot-boilerplate
cd chatbot-boilerplate
rm -rf .git
Now we need to install the Composer dependencies:
composer install
This boilerplate is working with a .env file (environment). All sensible data like keys are stored there. This file
should be listed in your .gitignore file. This is because this data should not be included in your repository.
Additionally, you can use different keys in different environments. (e.g., test bot platform account on your local
environment)
In this boilerplate there is an example file included called .env.example. Rename it to use it.
mv .env.example .env
Next, take a look at this file. Here we have two values to consider for now. First one is the WEBHOOK_VERIFY_TOKEN which is a token you can define yourself here. Fill something in now; we will need it later. The second value is the PAGE_ACCESS_TOKEN which we already got from our messenger app. Fill it in here. Perfect!
Create a webhook for the messenger app
On our PHP application, we need to have a webhook. This means a public URL that Facebook can talk to. Every time the user writes a message inside the FB chat, FB will send it to this URL which is the entrance point to our PHP application. In this boilerplate, it is the index.php file.
So we need a public URL to the index.php file, and there are two options here for you.
Make it live
If you got a server, you could push your code there where you have public access to it. The URL then maybe looks like https://yourserver.com/chatbot-php-boilerplate/.
Do it locally
For testing, it is easier when you don't have to push every change to a live server to test the code. This is why I use a local public URL. There are multiple services out there that generate a public URL to your local server. Checkout out ngrok or use Laravel Valet Sharing which is my choice since I'm using Valet already. (Laravel Valet is using ngrok under the hood too)
It doesn't matter how you do it, but you just need a secured public URL to the index.php file. (https!). This is my URL: https://7def2gH4.ngrok.io
Connect the Facebook app to your application
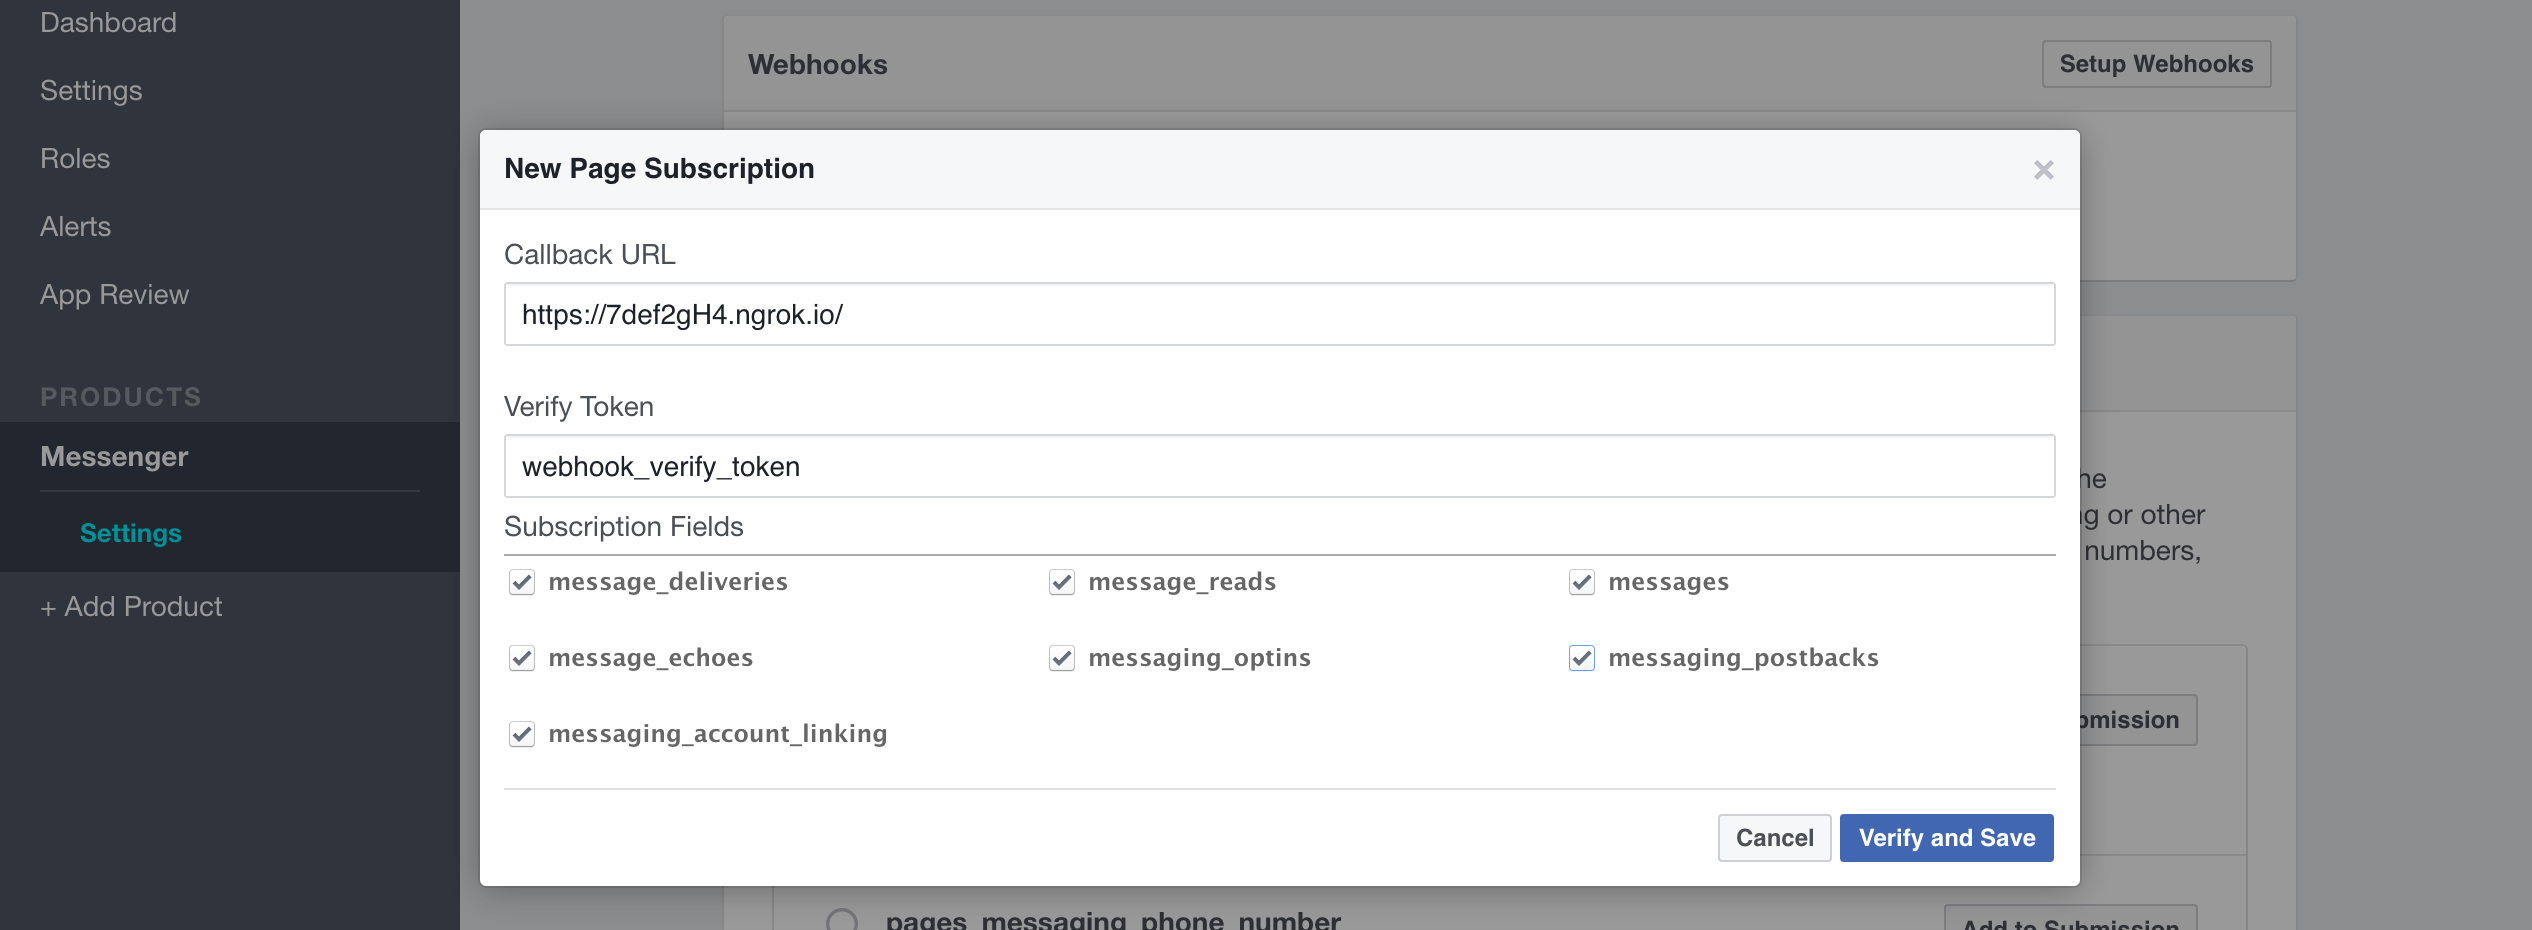
Now that we got the URL we need to setup the webhook. Go back to your Facebook app settings and click Setup Webhooks
inside the Webhooks part.

Fill in in the public URL, the WEBHOOK_VERIFY_TOKEN from the .env file, check all the subscription fields and click
Verify and Save.
If you did everything right, you have a working webhook now. If not you will see an error icon in the webhook URL field. This happens if the URL or the token is not correct.
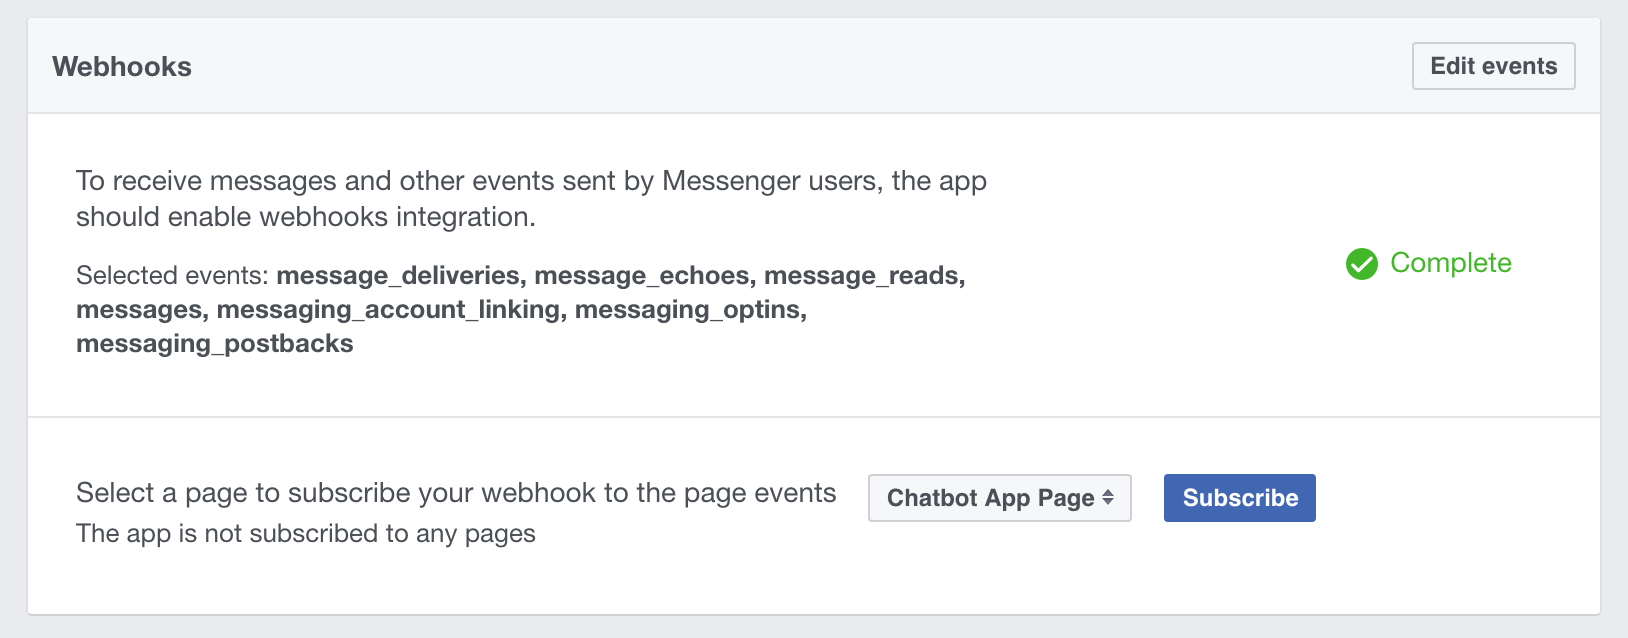
Connect the Facebook app to the Facebook page
Now the last step of the installation will make sure that our Facebook app is connected to the Facebook page. For this purpose, there is a drop-down within your Webhooks setting page. Choose your page here and click Subscribe.
Test it
So finally we can test the whole setup. Go to your Facebook page and click the message button to send a message. Type Hi and press enter. You should now see this answer: Define your own logic to reply to this message: Hi
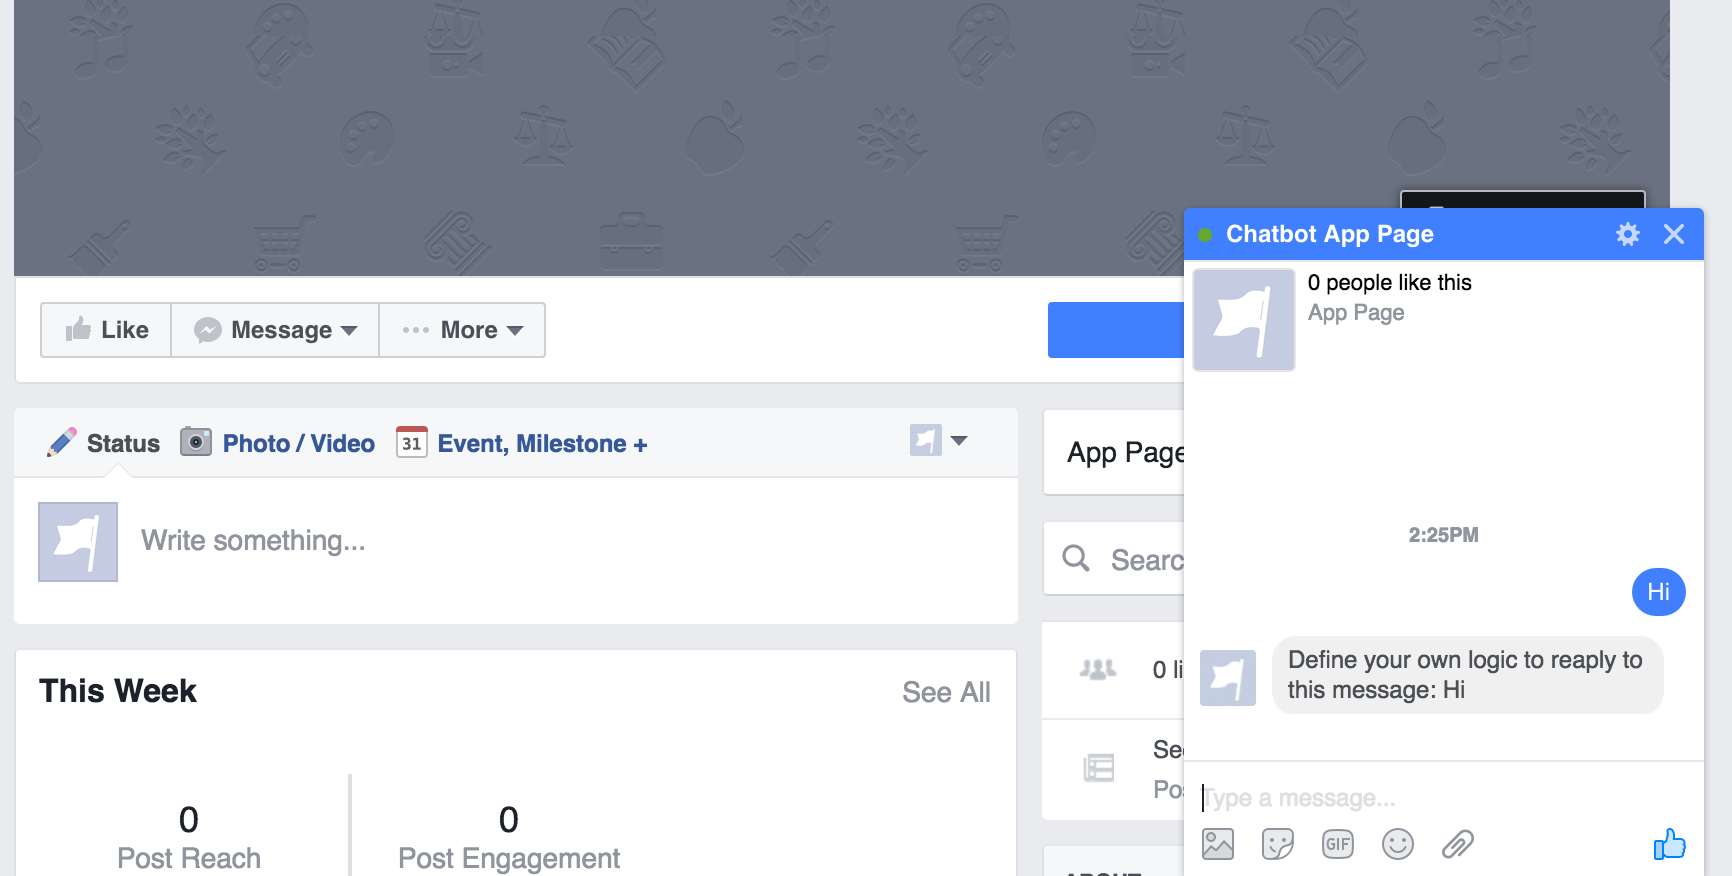
If you see this, then congratulations. You did it! You have successfully installed the Chatbot PHP Boilerplate and received your first reply.
If you don't get a reply, then something went wrong =( Check your server's log files to find out more. Additionally, you can use the built-in Monolog Logger to debug the applications.
Usage
Example 1: Static message
In your index.php file you will find this line of code:
$replyMessage = $chatbotHelper->getAnswer($message);
Here the user's message is being used to get an answer. In this case, the message is analyzed in the ChatbotAi method getAnswer. It is simply returning a static text with the original message. Like mentioned below, you can define your own logic to respond to the message. It is also common to use PHP's preg_match function to look for words inside the message. In the example, the method returns some hello text, if the message contains hi, hey or hello.
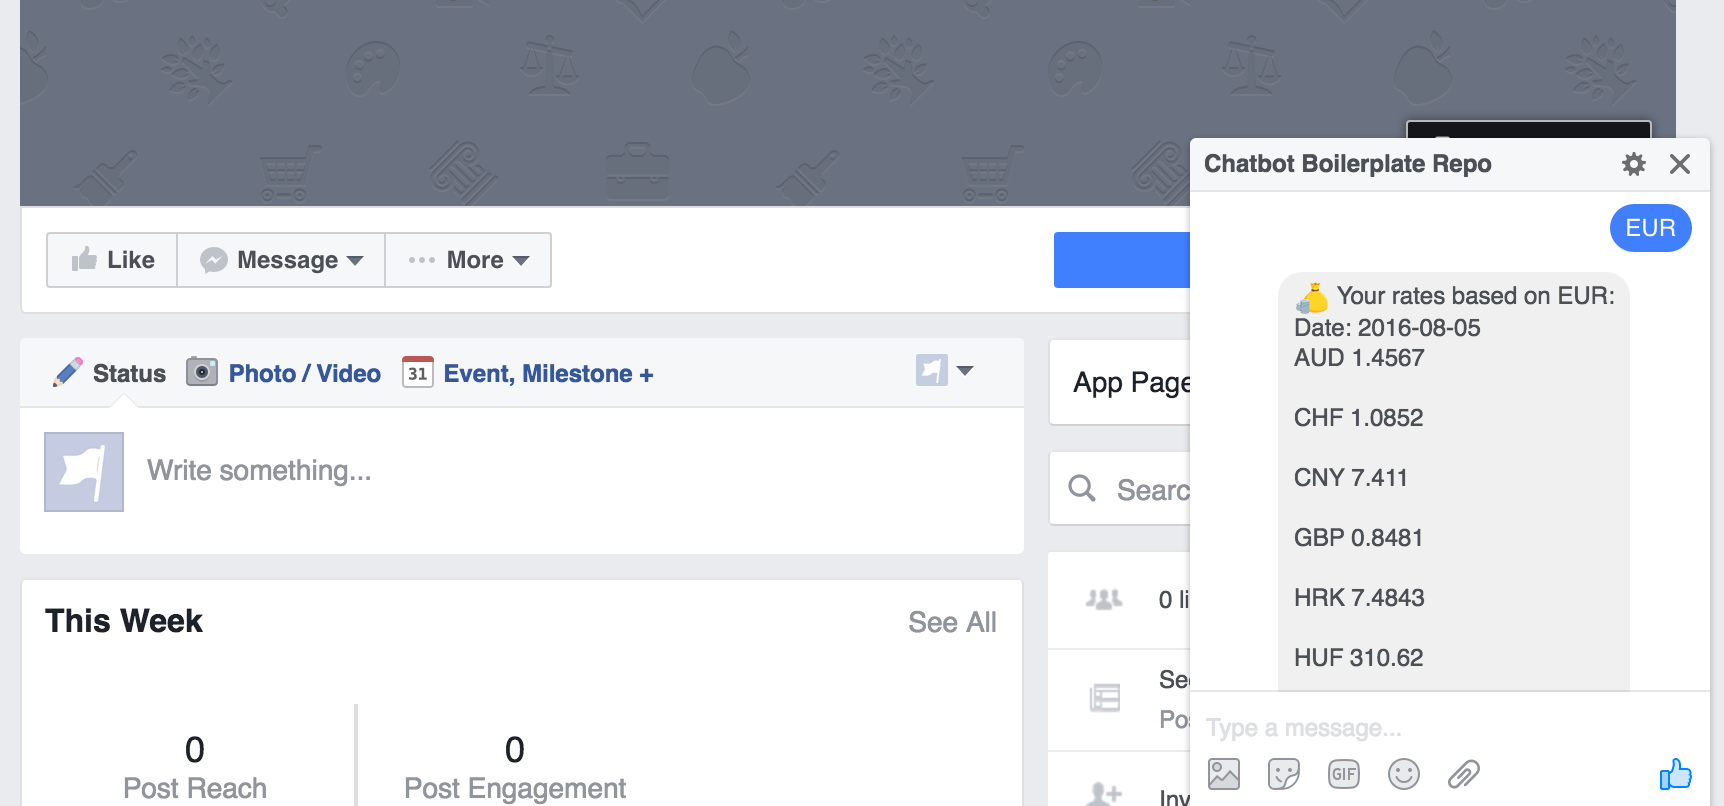
Example 2: Foreign Exchange Rates
Here a public API is used to return foreign exchange rates to the user. The user can type currencies like EUR, USD,
CHF etc. It is a simple example but good to see how to work with external APIs. To make it work, comment out the first example and uncomment the second.
// Example 1: Get a static message back
//$replyMessage = $chatbotHelper->getAnswer($message);

// Example 2: Get foreign exchange rates
$replyMessage = $chatbotHelper->getAnswer($message, 'rates');
Example 3: Using Dialogflow
NLP platforms can help you analyze the user's intent of a message; we can use them as a service where we send the user's message to.
To use Dialog flow you just need to add the parameter dialogflow to the getAnswer method. There is also an example in your index .php
file.
// Don't forget to provide your Dialogflow token in the .env file
$replyMessage = $chatbotHelper->getAnswer($message, 'dialogflow');
Besides that, you also need to set up an intent in Dialogflow. I won't cover that in this tutorial, but I will show you a screenshot of the one that I use for this example.
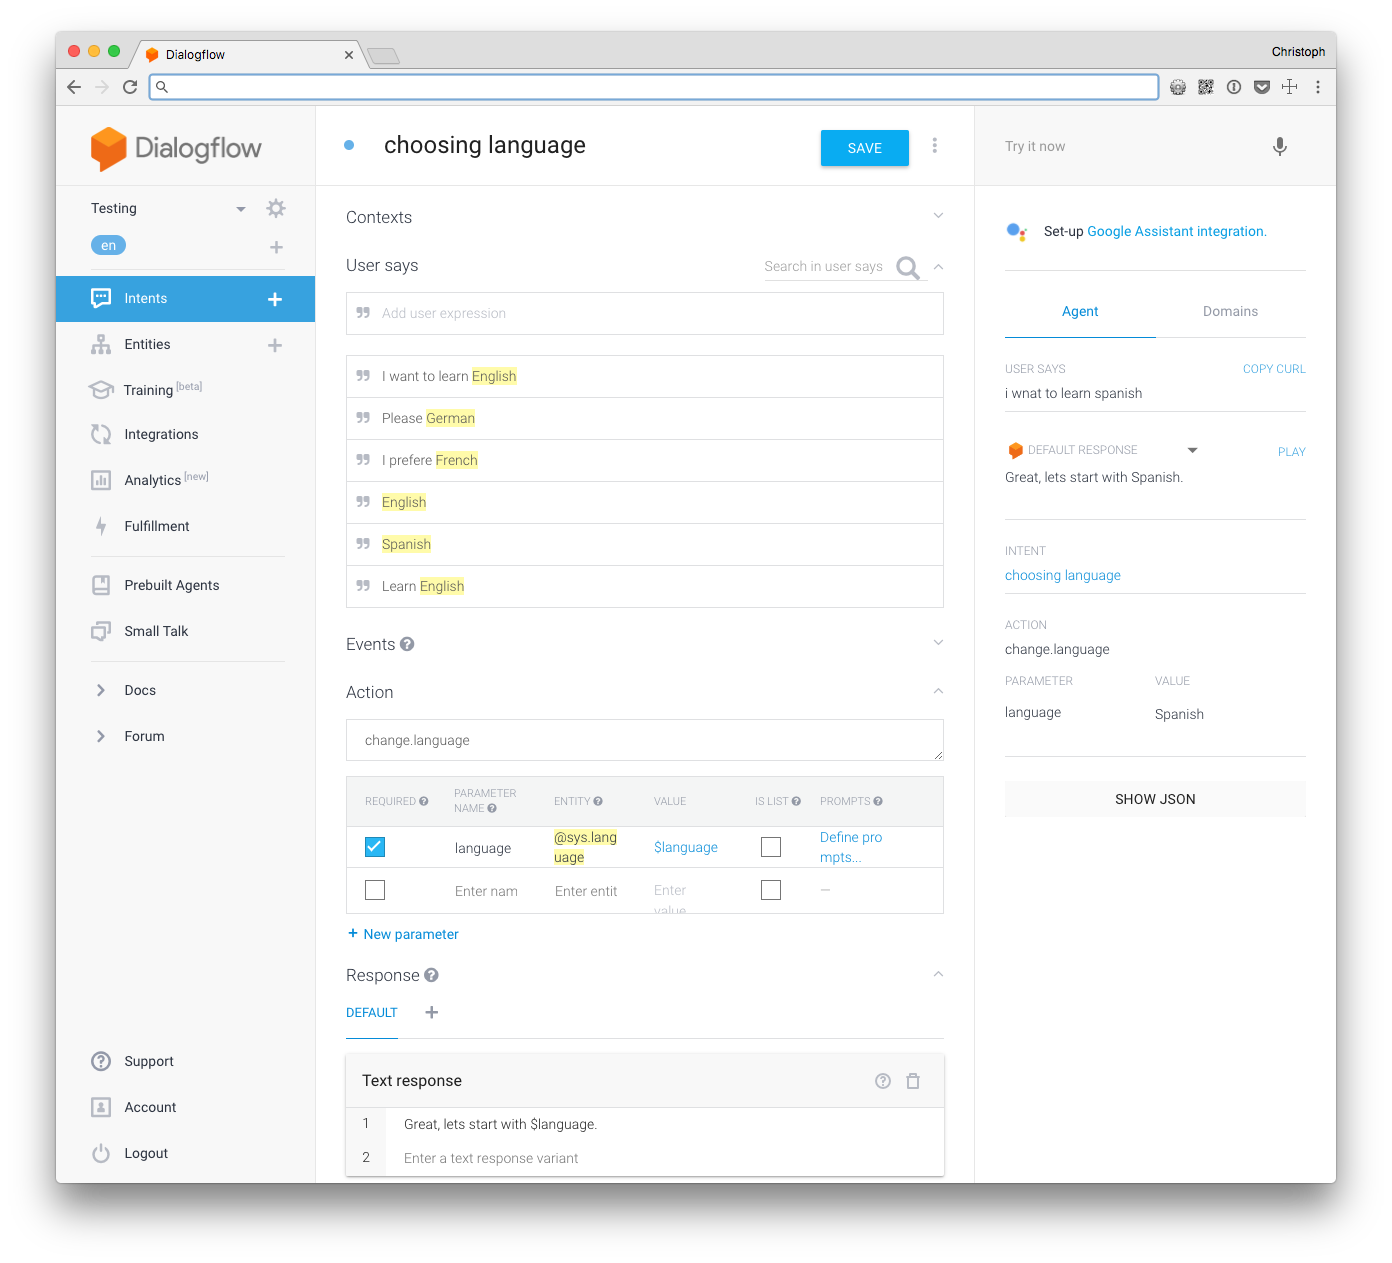
When you now type something like I want to learn English or What about we learn Spanish today Dialogflow will match the intent and send back the prepared answer which is Great, let's start with $language. So it will also automatically detect the language the user said.
UPDATE: It is now also possible to make use of DialogFlow's payload responses. If you want to reply custom Facebook payloads right from DialogFlow, then this is what you need. But it only works, when there is no text response added to the intent. Check out the changes for more details.
Example 4: Using wit.ai
The former story feature from wit.ai has been deprecated. Right now I wouldn't recommend using wit.ai, and this is why I removed that part of the article and the code.
Conclusion
You should now have a simple chatbot and a perfect setup for building your own. Try to implement your logic now to respond to the user's messages. This repo should be a place where you can try this stuff out.
If you plan to build a bigger chatbot, please check out my tutorials on how to use a professional bot library like BotMan to build bots for Facebook, Telegram or Slack.